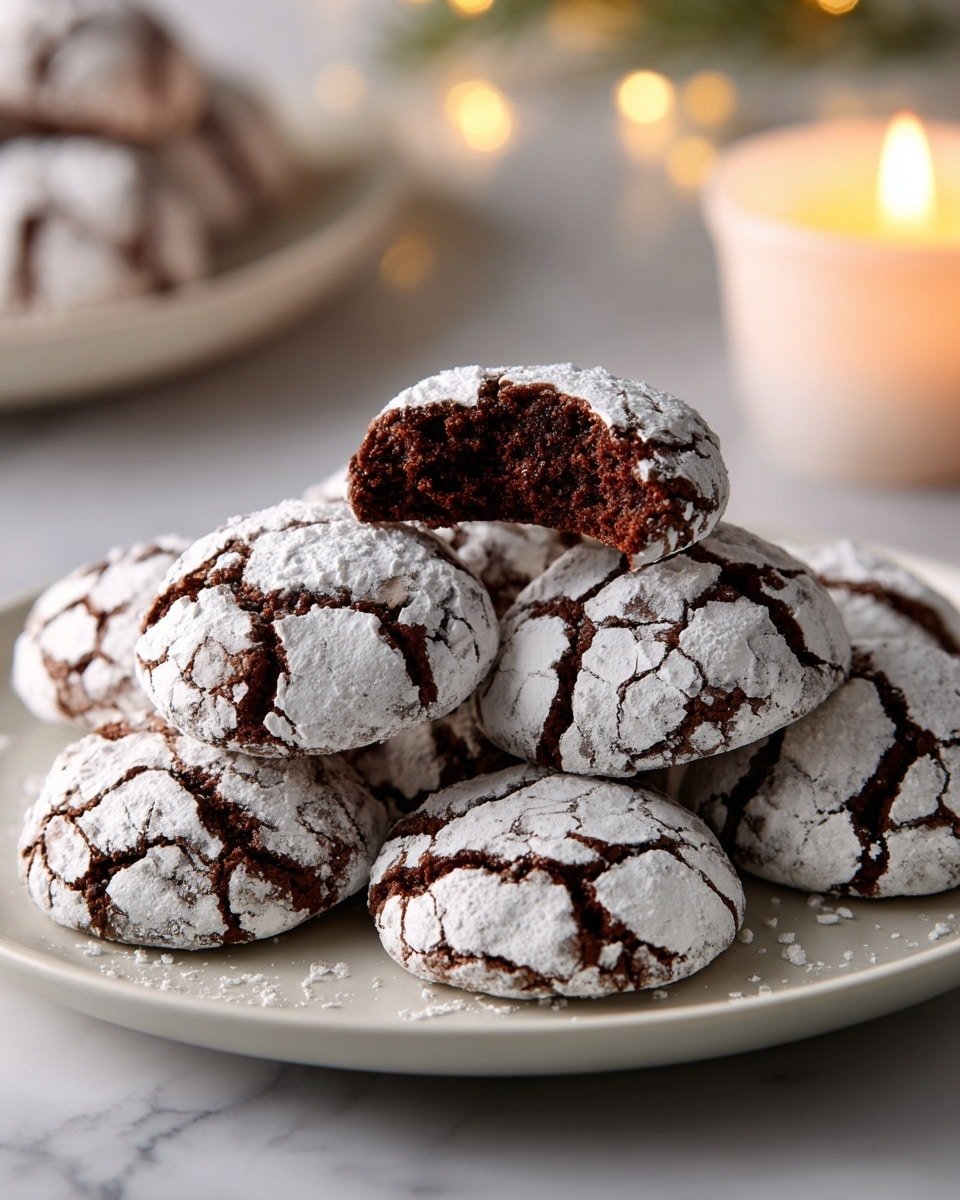
The Classic Chocolate Snowball Cookies Recipe is a delightful twist on the traditional snowball cookie, bringing in rich cocoa and crunchy nuts for a cozy treat. I love making these around the holidays or whenever I crave something that feels a little festive but easy to pull off. You'll notice they have that perfect melt-in-your-mouth texture, dusted with sweet powdered sugar to create their signature snowy look.

Jump to:
What Sets This Apart
These cookies marry a silky cocoa dough with the crunch of toasted nuts, then get a snowy coat of powdered sugar that never feels too sweet but looks magical. It's an easy recipe I keep coming back to because it's just so approachable and forgiving.
- Consistent Results: This recipe strikes the right balance so your cookies spread minimally and stay soft but firm.
- Rich, Balanced Flavor: Cocoa powder adds warmth without bitterness, complemented by a subtle vanilla note.
- Pantry-First Ingredients: You probably have all of these simple ingredients on hand already, which means no extra grocery runs.
- Weeknight Friendly: The dough mixes up fast, and the bake time is short-perfect for a last-minute sweet fix.
Ingredient Snapshot
I always recommend using room-temperature butter for creamy mixing and choosing fresh cocoa powder for that deep chocolate aroma in this Classic Chocolate Snowball Cookies Recipe.
- Unsalted Butter: Ensures you control the salt; softened makes creaming smooth and easy.
- Powdered Sugar: Provides delicate sweetness and a powdery finish that clings beautifully.
- Vanilla Extract: Adds warmth and depth-use pure vanilla for best flavor.
- All-Purpose Flour: The backbone of structure here; measure carefully to keep cookies tender.
- Unsweetened Cocoa Powder: Gives that classic chocolate note without overpowering.
- Salt: Enhances all the flavors and balances the sweetness.
- Chopped Nuts (walnuts or pecans): Toast them gently beforehand if you want extra crunch and nuttiness.
Quick Note: Exact measurements are in the printable recipe card at the bottom.
How to Make Classic Chocolate Snowball Cookies Recipe
Step 1 - Prep & Season
Start by preheating your oven to 350°F (175°C). This ensures the cookies bake evenly right from the start. In a large bowl, cream together the softened butter and powdered sugar until the mixture is silky and smooth-this usually takes about 2-3 minutes with a hand mixer or stand mixer. When you see it lighten slightly and look glossy, add in the vanilla extract and mix just until combined. Avoid overmixing here to keep the dough tender.
Step 2 - Build Flavor
Whisk the all-purpose flour, cocoa powder, and salt together in a separate bowl. This helps evenly distribute the cocoa and salt throughout the dough, preventing clumps or salty pockets. Gradually add this dry mixture to your butter and sugar bowl, folding gently until everything comes together into a soft dough. Finally, fold in the finely chopped nuts. I like to toast mine briefly on the stove; it deepens their flavor and adds a toasty note that's unmistakable in the finished cookie.
Step 3 - Finish for Best Texture
Roll the dough into uniform 1-inch balls, placing them on a parchment-lined baking sheet roughly 1 inch apart to prevent sticking as they bake. Bake for 10 to 12 minutes-you want the cookies to be set but not browned. They'll still look soft when you pull them out, which is perfect. Let them cool on the sheet for about 5 minutes, then while still slightly warm, roll each one in powdered sugar. Once completely cooled, give them a second roll in sugar for that signature classic snowball appearance and extra delicate sweetness.
Cook's Notes & Tricks
From my experience making this Classic Chocolate Snowball Cookies Recipe, the biggest wins come from even shaping and careful baking time. You want to maintain that tender, melt-in-your-mouth texture, so watch the clock and the color closely.
- Doneness Cue: The cookies look set and slightly puffed but avoid any golden browning edges.
- Temperature Trick: Use room-temp butter for creaminess but keep your dough chilled if your kitchen is warm to prevent spreading.
- Make-Ahead Move: You can refrigerate the rolled dough balls for up to 24 hours before baking-just add a minute or two to baking time.
- Avoid This Pitfall: Don't skip the second roll in powdered sugar; it gives that signature snowy coating that's both pretty and flavorful.
Serve & Enjoy
Finishing Touches
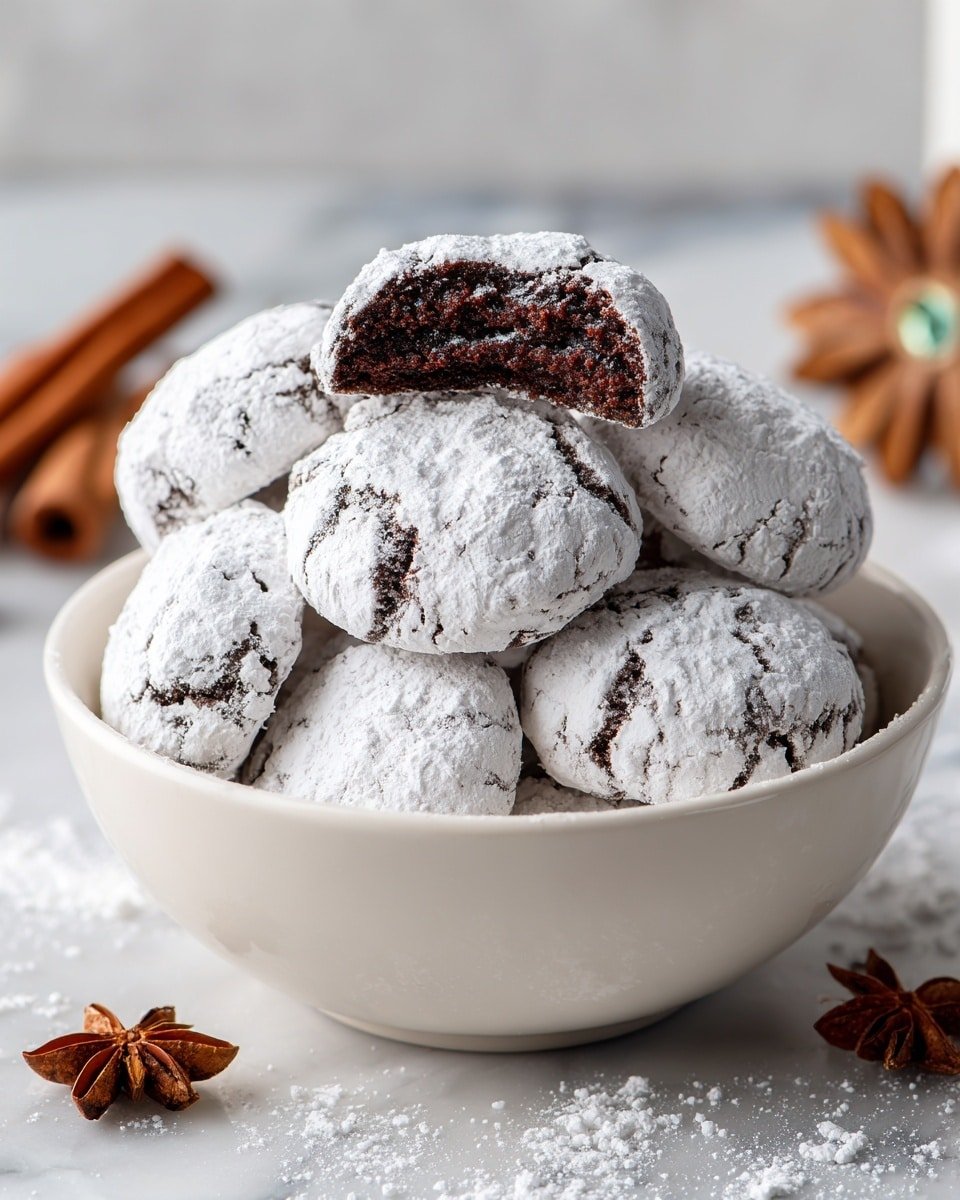
I love serving these cookies dusted with a little extra powdered sugar right before guests arrive. It keeps that fresh, snowy look intact. Sometimes, a tiny sprinkle of flaky sea salt on top adds a surprising but delicious contrast if you like a hint of savory balancing the sweetness.
Pairs Beautifully With
These Classic Chocolate Snowball Cookies Recipe treats pair wonderfully with a cozy cup of hot coffee or chai tea for warmth, or a glass of cold milk for a simple classic combo. For a fun twist, try them alongside a rich berry jam or a scoop of vanilla ice cream to balance the chocolate and nuts.
Simple Plating Wins
Arrange your cookies on a rustic wooden board or a bright ceramic platter with sprigs of fresh mint or powdered sugar dusted around for some snowflake vibes. For weeknight treats, a simple stack on a plate garnished with a few whole nuts looks inviting without any fuss.
Make-Ahead, Storage & Reheat
Storing Leftovers
Store cookies in an airtight container at room temperature for up to 5 days. They keep tender yet hold their slightly crumbly texture well. I find adding a small slice of bread to the container helps maintain moisture without making them soggy.
Freezing Tips
These cookies freeze beautifully-wrap them tightly or place in a freezer-safe container with parchment paper between layers. Thaw at room temperature for an hour or two before serving to keep their soft texture intact.
Reheating Classic Chocolate Snowball Cookies Recipe Without Drying Out
To refresh your cookies, warm them briefly in a 300°F (150°C) oven for about 5 minutes wrapped loosely in foil to trap moisture. You can also microwave for 10 seconds on low power, but watch closely-too long and they dry out quickly. Re-rolling a light dusting of powdered sugar after reheating revives their snowy charm.
Frequently Asked Questions
Absolutely! Walnuts and pecans are traditional, but almonds or hazelnuts work well too. Just chop them finely and consider toasting for extra flavor.
The first coating while warm helps sugar stick, sealing in moisture. The second roll after cooling adds the classic snowy, powdery finish that defines this recipe's look and texture.
Yes! Chilling the dough balls in the fridge for up to 24 hours is even better-it helps control spreading and intensifies flavor.
Make sure your butter is softened but not too warm. Chilling the dough before baking can also keep the cookies from flattening too much during baking.
Final Thoughts
Making this Classic Chocolate Snowball Cookies Recipe reminds me how simple ingredients and a little love create something truly special. I hope you enjoy these tender, chocolatey bites dusted in snow as much as I do. They're that perfect blend of easy and elegant-cookies that feel homemade and a little festive every single time.
PrintFull Recipe
Classic Chocolate Snowball Cookies Recipe

Classic Chocolate Snowball Cookies are rich, buttery treats coated in powdered sugar that create a snowy appearance. These cocoa-flavored cookies are easy to make with simple ingredients like butter, cocoa powder, nuts, and powdered sugar, perfect for holidays or any cozy moment.
- Prep Time: 15 minutes
- Cook Time: 12 minutes
- Total Time: 27 minutes
- Yield: 24 cookies
- Category: Dessert
- Method: Baking
- Cuisine: American
- Diet: Vegetarian
Ingredients
Cookie Dough
- 1 cup unsalted butter softened
- ½ cup powdered sugar plus more for coating
- 1 teaspoon vanilla extract
- 1 ¾ cups all-purpose flour
- ¼ cup unsweetened cocoa powder
- ¼ teaspoon salt
- ¾ cup finely chopped nuts (walnuts or pecans work best)
Instructions
- Make the Dough: Preheat your oven to 350°F (175°C). In a large bowl, cream together the softened butter and powdered sugar until smooth. Mix in vanilla extract until well blended.
- Add the Dry Ingredients: In a separate bowl, whisk together all-purpose flour, unsweetened cocoa powder, and salt. Gradually add the dry mixture to the butter mixture, stirring until fully combined. Fold in the finely chopped nuts gently.
- Shape the Cookies: Roll the dough into 1-inch balls and place them about 1 inch apart on a baking sheet lined with parchment paper to prevent sticking.
- Bake: Bake the cookies for 12 minutes or until they are set but not browned. Remove from the oven and let them cool on the baking sheet for 5 minutes.
- Coat with Sugar: While the cookies are still slightly warm, roll them in powdered sugar to coat evenly. Let them cool completely, then roll them in powdered sugar a second time to achieve a snowy finish.
Notes
- Use room temperature butter for easier creaming and better cookie texture.
- For a nut-free version, omit the nuts or substitute with toasted coconut flakes.
- Chill the dough for 30 minutes if it's too soft to handle when shaping.
- Store cookies in an airtight container at room temperature for up to one week.
- For even coating, use fine powdered sugar rather than granulated sugar.


Leave a Reply