If you're looking for a festive, fun, and utterly delicious holiday treat, this No-Bake Mini Santa Cheesecakes Recipe is a must-try. Perfect for anytime you want to impress without turning on the oven, these mini cheesecakes bring holiday cheer in every glossy, creamy bite. I love making these during busy December evenings when baking feels like too much work-but the results still feel special and homemade.
Jump to:
What Sets This Apart
This No-Bake Mini Santa Cheesecakes Recipe stands out because it blends ease, flavor, and festive presentation seamlessly-no oven required. Once you get the hang of the little assembly details, it's quick to replicate and always draws smiles.
- Consistent Results: The simple crust and fluffy filling come together reliably every time, so no last-minute fixes needed.
- Rich, Balanced Flavor: Cream cheese and whipped cream create a luxuriously light but creamy texture with just the right sweetness.
- Pantry-First Ingredients: You'll use staples you likely already have, plus fresh strawberries to top off that Santa charm.
- Weeknight Friendly: The no-bake technique means less fuss and cleanup, perfect for busy holiday evenings.
Ingredient Snapshot
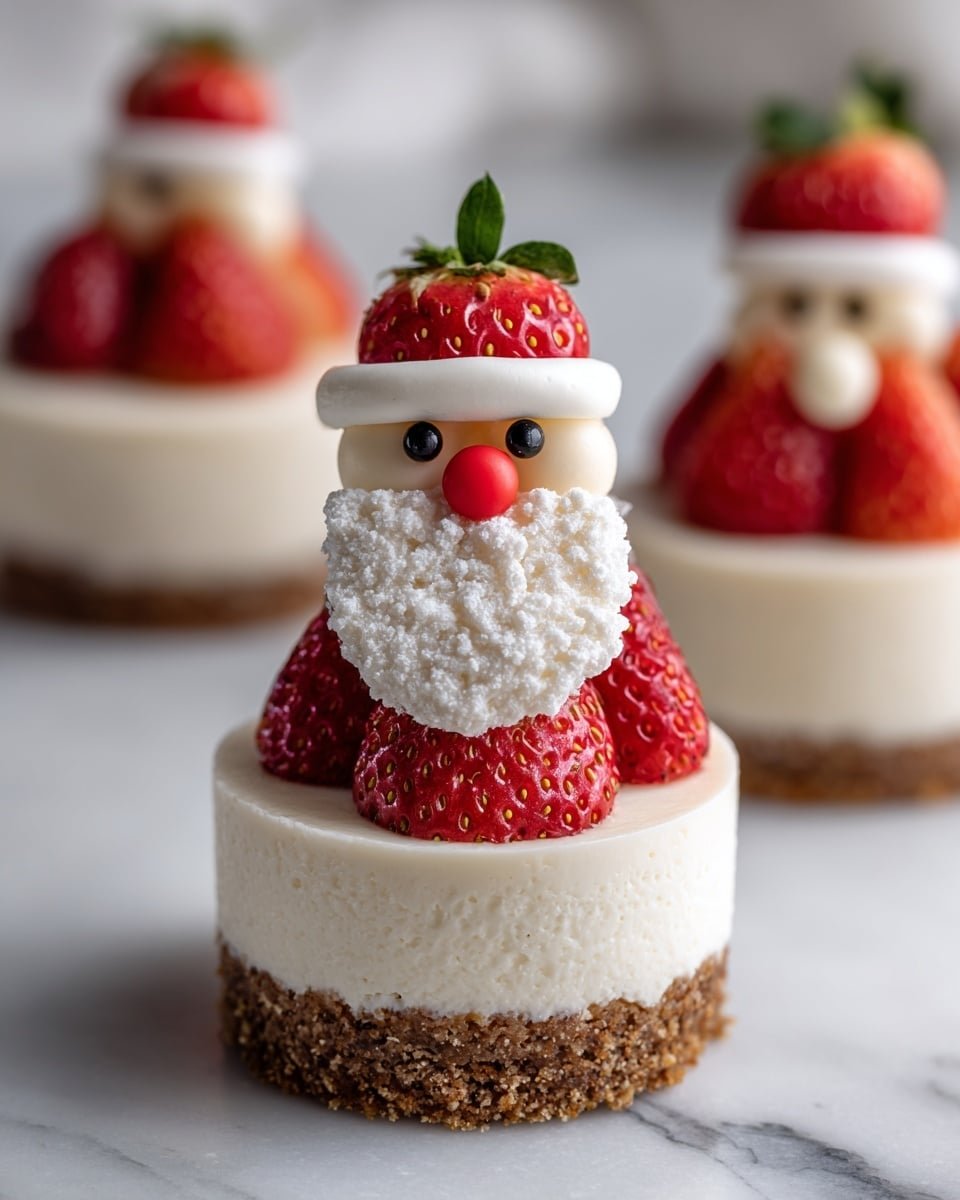
For this No-Bake Mini Santa Cheesecakes Recipe, quality ingredients make all the difference. Use fresh strawberries for bright, juicy Santa hats and room temperature cream cheese to prevent lumps in the filling.
- Graham Cracker Crumbs: Look for finely crushed crumbs so the crust packs firmly and evenly.
- Unsalted Butter: Melted and slightly cooled, it binds the crust perfectly without greasiness.
- Cream Cheese: Softened at room temp to avoid grainy texture and ensure smooth creaminess.
- Heavy Cream: Cold from the fridge to whip up nicely into stiff peaks for light filling.
- Strawberries: Choose bright red, firm berries for the best Santa "hats" that hold their shape.
Quick Note: Exact measurements are in the printable recipe card at the bottom.
How to Make No-Bake Mini Santa Cheesecakes Recipe
Step 1 - Prep & Season
Start by mixing your graham cracker crumbs with melted butter and sugar until everything looks like wet sand-you should be able to press it together and have it hold shape. Lining a muffin tin with cupcake liners makes cleanup a breeze. Press roughly a tablespoon of crust mixture firmly into the bottom of each liner; you want a compact base to support the creamy filling. Pop these into the fridge to chill while you tackle the filling-it helps the crust set firmly so it won't crumble later.
Step 2 - Build Flavor
Beat the softened cream cheese with powdered sugar and vanilla until you get a smooth, glossy texture-around 2 to 3 minutes on medium speed. If you see any lumps, keep mixing; patience here means silky filling. Separately, whip the cold heavy cream until firm peaks form; this usually takes about 3 to 4 minutes, but watch it closely to avoid overwhipping, which makes it grainy. Fold the whipped cream gently into the cream cheese mixture-this lightens the batter and gives you that melt-in-your-mouth cheesecake feel. Spoon or pipe the filling into your chilled crusts, filling each about three-quarters full. Back into the fridge for at least 3 hours; this step is crucial for firm, sliceable cheesecakes.
Step 3 - Finish for Best Texture
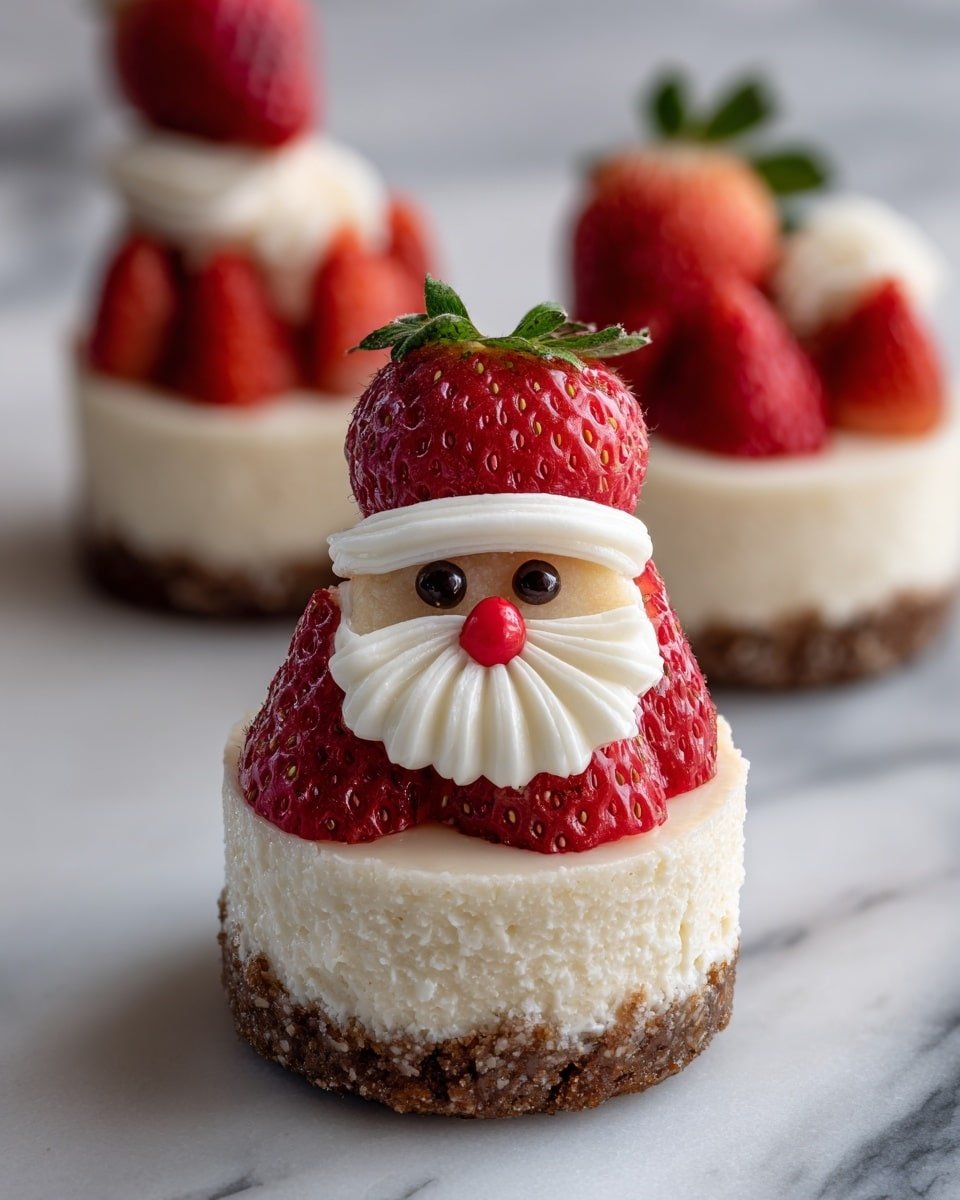
When the cheesecakes have set, it's time to bring on the festive Santa faces. Position a hulled strawberry, pointed side up, as the Santa hat on each mini cheesecake. Use a piping bag or small spoon to add whipped cream or frosting around the base of the strawberry, shaping Santa's beard, and add a fluffy dollop on top like the pom-pom. Finishing touches like candy eyes and a red nose make your Santas instantly adorable. A light dusting of powdered sugar adds a snowy sparkle. Keep these refrigerated until you're ready to serve so they hold their shape and texture perfectly.
Cook's Notes & Tricks
From my experience, the key to perfect No-Bake Mini Santa Cheesecakes Recipe lies in timing your chilling and being gentle when folding in the whipped cream. Rushing the process or overmixing can make the texture off. Also, fresh strawberries not only look great but keep the whole dessert light and vibrant.
- Doneness Cue: The filling should be firm to the touch after chilling, not jiggly.
- Temperature Trick: Always use room temperature cream cheese and cold heavy cream for smooth, fluffy results.
- Make-Ahead Move: These cheesecakes keep well in the fridge for up to 2 days-great for holiday prep.
- Avoid This Pitfall: Don't skip chilling the crust before filling; it helps keep the base crisp and intact.
Serve & Enjoy

Finishing Touches
The little details make this No-Bake Mini Santa Cheesecakes Recipe really shine. Using dollops of fresh whipped cream for the beard and hat trim adds a light, airy contrast to the creamy filling. And those tiny candy eyes and red noses? They bring an instant smile and festive feeling to every bite-a small touch with big impact.
Pairs Beautifully With
You'll love pairing these mini cheesecakes with a hot cup of spiced cider or a rich espresso for a cozy contrast. For gatherings, a crisp sparkling water with a twist of citrus helps cut the richness and refresh the palate between bites.
Simple Plating Wins
Keep the presentation joyful but effortless: arrange the mini cheesecakes on a festive platter with dusted powdered sugar sprinkled lightly around the plate for a gentle snowy effect. A few fresh mint leaves on the side add a pop of color and a hint of freshness, elevating the look without fuss.
Make-Ahead, Storage & Reheat
Storing Leftovers
Store leftover No-Bake Mini Santa Cheesecakes Recipe in an airtight container in the fridge to keep them fresh and creamy for up to 2 days. The crust will stay crisp longer if you keep the cheesecakes chilled and avoid excess moisture.
Freezing Tips
While these cheesecakes freeze fairly well, fresh strawberry toppings don't fare as nicely. If you freeze, store only the crust and filling in a sealed container for up to 1 month, then thaw overnight in the fridge. Add the fresh decorations just before serving for best results.
Reheating No-Bake Mini Santa Cheesecakes Recipe Without Drying Out
Since these are best served chilled, reheating generally isn't recommended. If you do want to warm slightly, use a low microwave power for just a few seconds to avoid melting the structure or drying out the filling. Ideally, let them come to room temperature for 10 minutes to enjoy their creamy texture fully.
Frequently Asked Questions
Absolutely! You can prepare the crust and filling up to a day in advance and chill them until ready to decorate and serve.
Digestive biscuits or vanilla wafers make great substitutes for the crust and provide a similar texture and flavor.
Taste your filling after adding powdered sugar and adjust to your preference, keeping in mind the sweetness of the crust and toppings.
Yes, you can use raspberries or mini red fruits and pipe whipped cream hats to replicate the Santa look.
Final Thoughts
I love how this No-Bake Mini Santa Cheesecakes Recipe transforms basic ingredients into something whimsically festive and utterly delicious. It's a joy to assemble with kids or friends, and the no-bake process means you spend more time savoring and less time fussing in the kitchen. Give it a try; I promise you'll enjoy the creamy texture, sweet yet balanced flavors, and the burst of holiday spirit in every bite.
PrintFull Recipe
No-Bake Mini Santa Cheesecakes Recipe
These charming No-Bake Mini Santa Cheesecakes are a festive and delightful holiday treat. Featuring a crunchy graham cracker crust, a smooth and creamy cheesecake filling, and adorable Santa-themed decorations made with strawberries, whipped cream, and candy, these cheesecakes are perfect for holiday parties or a sweet seasonal dessert.
- Prep Time: 30 minutes
- Cook Time: 0 minutes
- Total Time: 3 hours 30 minutes
- Yield: 12 servings
- Category: Dessert
- Method: No-Cook
- Cuisine: American
Ingredients
For the Crust
- 1 cup graham cracker crumbs (about 8 graham crackers)
- ¼ cup unsalted butter, melted
- 1 tablespoon granulated sugar
For the Cheesecake Filling
- 8 ounces cream cheese, softened
- ½ cup powdered sugar
- 1 teaspoon vanilla extract
- 1 cup heavy cream, cold
For the Santa Decorations
- 12 large strawberries, hulled (for Santa hats)
- Whipped cream or frosting (for the Santa beard and hat trim)
- Small candy eyes or black gel icing (for Santa's eyes)
- Small red candies or icing (for Santa's nose)
- Powdered sugar, for dusting (optional, for a snowy effect)
Instructions
- Make the Crust: In a mixing bowl, combine graham cracker crumbs, melted butter, and granulated sugar. Stir until the crumbs are evenly coated and resemble wet sand. Line a muffin tin with cupcake liners. Press about 1 tablespoon of the crust mixture firmly into the bottom of each liner to create a compact layer. Place the muffin tin in the refrigerator to chill and set while preparing the filling.
- Prepare the Cheesecake Filling: In a large mixing bowl, beat the softened cream cheese with an electric mixer until smooth and creamy, about 2 to 3 minutes. Add powdered sugar and vanilla extract, then continue beating until fully combined and smooth. In a separate bowl, whip the cold heavy cream until stiff peaks form, about 3 to 4 minutes-be careful not to overbeat. Gently fold the whipped cream into the cream cheese mixture until fully incorporated and smooth. Spoon or pipe the cheesecake filling over the chilled crusts in the muffin cups, filling each about three-quarters full. Refrigerate for at least 3 hours until set.
- Decorate with Santa Faces: Place a hulled strawberry pointed side up on top of each cheesecake to resemble Santa's hat. Use whipped cream or frosting to pipe a beard around the base of the strawberry and add a dollop on top for the pompom of the hat. Attach small candy eyes or use black gel icing to create Santa's eyes. Place a small red candy or a dab of red icing on each for the nose. Optionally, dust the tops lightly with powdered sugar for a snowy effect.
Notes
- Use full-fat cream cheese and heavy cream for the creamiest texture.
- Make sure cream cheese is softened to avoid lumps in the filling.
- Chilling the crust before adding the filling helps it set firmly.
- For a quicker set, you can refrigerate overnight.
- Substitute candy eyes with small chocolate chips or mini chocolate candies if preferred.
- Use store-bought whipped topping if short on time, but homemade whipped cream gives the best texture.
- To avoid watery topping, pat strawberries dry before decorating.


Leave a Reply