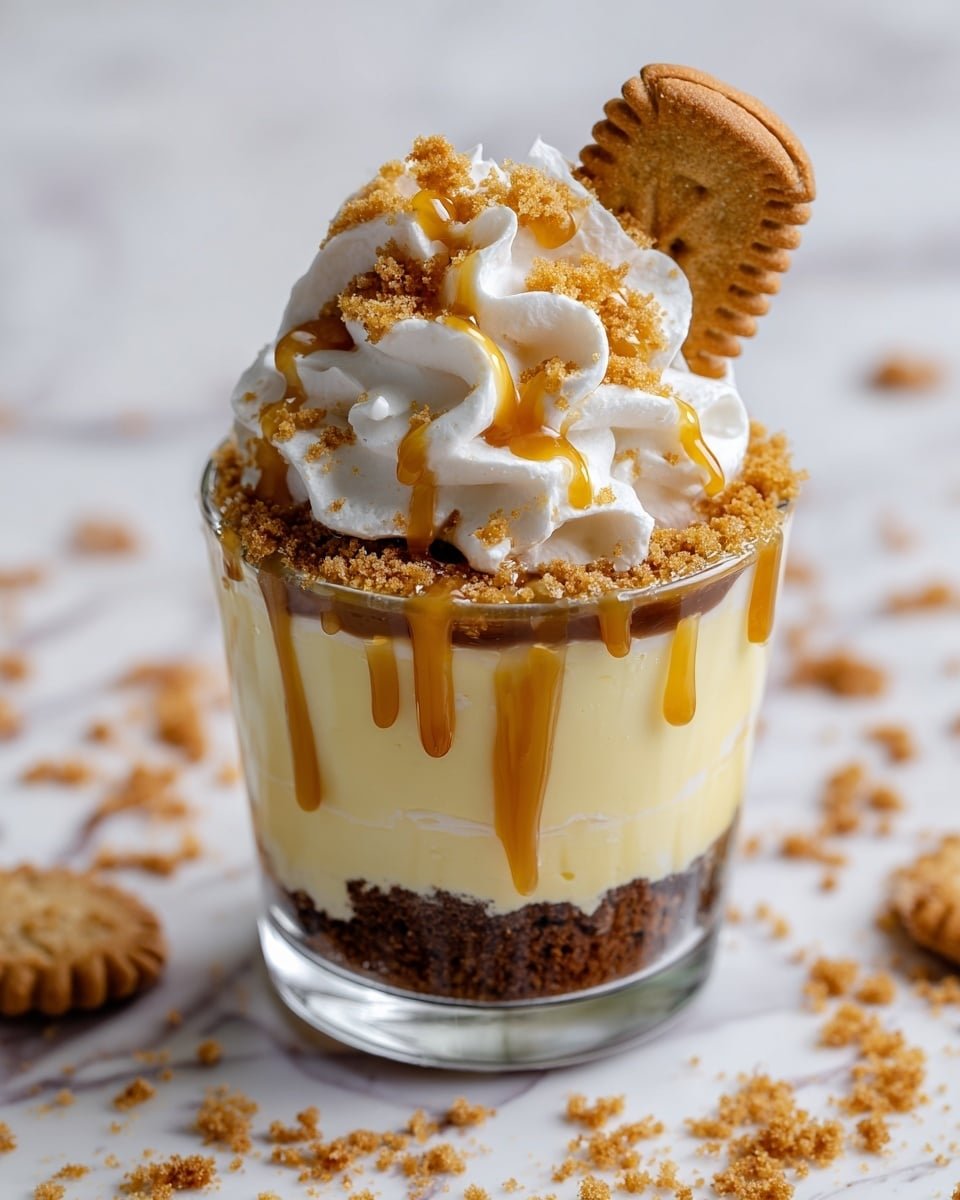
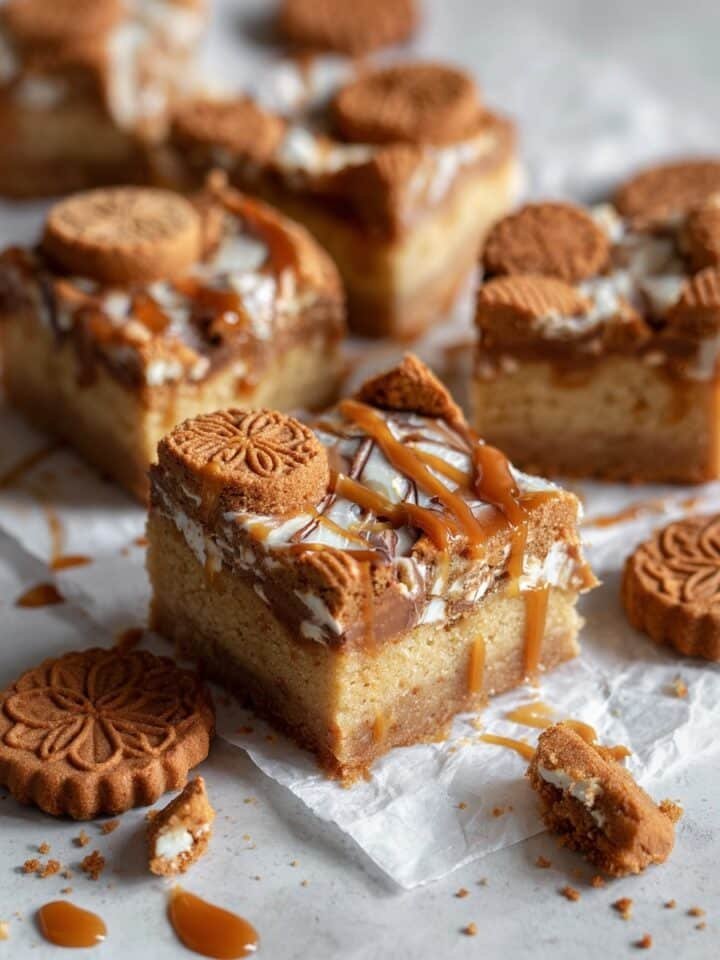
If you're craving a dessert that feels both indulgent and effortlessly charming, the Cookie Butter Cheesecake Cups Recipe is exactly what you need. Whether you're entertaining guests or just treating yourself on a cozy evening, these individual cups pack layers of creamy cheesecake and the warm, spiced notes of cookie butter. The best part? They're simple enough to whip up after dinner but impressive enough for special occasions.

Jump to:
What Sets This Apart
This recipe shines because it captures the nostalgic flavor of cookie butter in a delicate cheesecake format, turning a simple treat into a luscious dessert cup. You'll enjoy the balance between the buttery cookie crust with that creamy, glossy filling that's just sweet enough, never overpowering.
- Consistent Results: The step-by-step layering makes it nearly foolproof so tracking your progress is easy, even if you're new to no-bake desserts.
- Rich, Balanced Flavor: Using a mix of cookie crumbs and creamy cookie butter adds a spicy warmth without overwhelming the fresh cream cheese base.
- Pantry-First Ingredients: You'll often have these staples on hand-cream cheese, heavy cream, and cookie butter-making it perfect for an unexpected dessert craving.
- Weeknight Friendly: No oven required, so you can quickly pull these together after dinner and enjoy chilled by bedtime.
Ingredient Snapshot
Choosing quality ingredients here makes a huge difference in flavor and texture. I always find that starting with fresh cream cheese and a good-quality cookie butter spread brings a harmony that's hard to beat.
- Cookie Butter Sandwich Cookies or Speculoos Cookies: Use fresh, crunchy cookies for the crust - those with a crisp texture provide a solid, toasty base that won't turn soggy.
- Unsalted Butter: Melted butter binds the cookie crumbs perfectly; unsalted gives you control over salt balance.
- Cream Cheese: Bring it to room temperature for ultra-smooth mixing and no lumps.
- Heavy Cream: Make sure it's cold to whip it quickly into stiff peaks, giving your cheesecake filling that airy lift.
- Powdered Sugar: It dissolves quickly, yielding a silky texture without grit.
- Cookie Butter Spread: Slightly warmed to a spreadable consistency so it layers smoothly, enhancing richness.
- Vanilla Extract: Adds warmth and depth to the cream cheese mixture.
Quick Note: Exact measurements are in the printable recipe card at the bottom.
How to Make Cookie Butter Cheesecake Cups Recipe
Step 1 - Prep & Season
Start by crushing your cookies into fine crumbs - I like to use a food processor for this to get an even, sandy texture, but a rolling pin and zip-top bag work just as well. Then mix the crumbs with melted butter until they feel like wet sand. Press this mixture firmly into the bottom of your serving cups or jars - use the back of a spoon or a small glass to compact it evenly. This step is crucial; a firmly packed crust means no crumbs falling apart when you dig in.
Step 2 - Build Flavor
Next, whisk the cream cheese in a bowl until luxuriously smooth and glossy - no lumps here. In a separate bowl, whip your cold heavy cream to stiff peaks; this takes just a few minutes if your cream and bowl are chilled, and you'll notice the cream will hold firm peaks when you lift the beaters. Gently fold in powdered sugar and vanilla into the cream cheese, then carefully fold in the whipped cream to keep it light and fluffy. Spread a thin layer of slightly warmed cookie butter over your crust, then spoon or pipe in your cheesecake filling on top. If you want to be extra indulgent, you can repeat these layers for a taller cup.
Step 3 - Finish for Best Texture
Chill your assembled cups in the fridge for at least 2 to 3 hours, allowing the filling to firm up and the flavors to meld. You'll know they're ready when the cheesecake layer feels set to the touch but still creamy, not hard. Avoid cutting the chilling time short; patience here rewards you with that perfect spoonable texture without any watery separation.
Cook's Notes & Tricks
I've learned that dry ingredients and cold bowls make whipping cream much easier, and warming cookie butter just a bit helps with smooth spreading. Don't rush folding - gentle is the key to keeping air in your filling. Once chilled, these cups develop a beautiful shine and firm texture, but if you leave them overnight, the flavors actually deepen.
- Doneness Cue: The cheesecake layer should jiggle slightly but hold form when nudged.
- Temperature Trick: Bring cream cheese to room temp while chilling heavy cream in freezer for 10 minutes to speed prepping.
- Make-Ahead Move: Assemble a day ahead and store covered; chilling enhances flavor and texture.
- Avoid This Pitfall: Don't overmix cream cheese or you'll lose that silky texture; mix just until smooth.
Serve & Enjoy
Finishing Touches
When it's time to serve, I love topping these cheesecake cups with a fresh swirl of whipped cream, a sprinkle of extra cookie crumbs for crunch, and a warm drizzle of cookie butter for that glossy, inviting finish. Each garnish enhances texture and invites you to savor every bite.
Pairs Beautifully With
These Cookie Butter Cheesecake Cups pair wonderfully with a light, fruity compote like raspberry or apple, which cuts through the richness. A cup of strong black coffee or lightly spiced chai tea also complements the warm spices in the cookies.
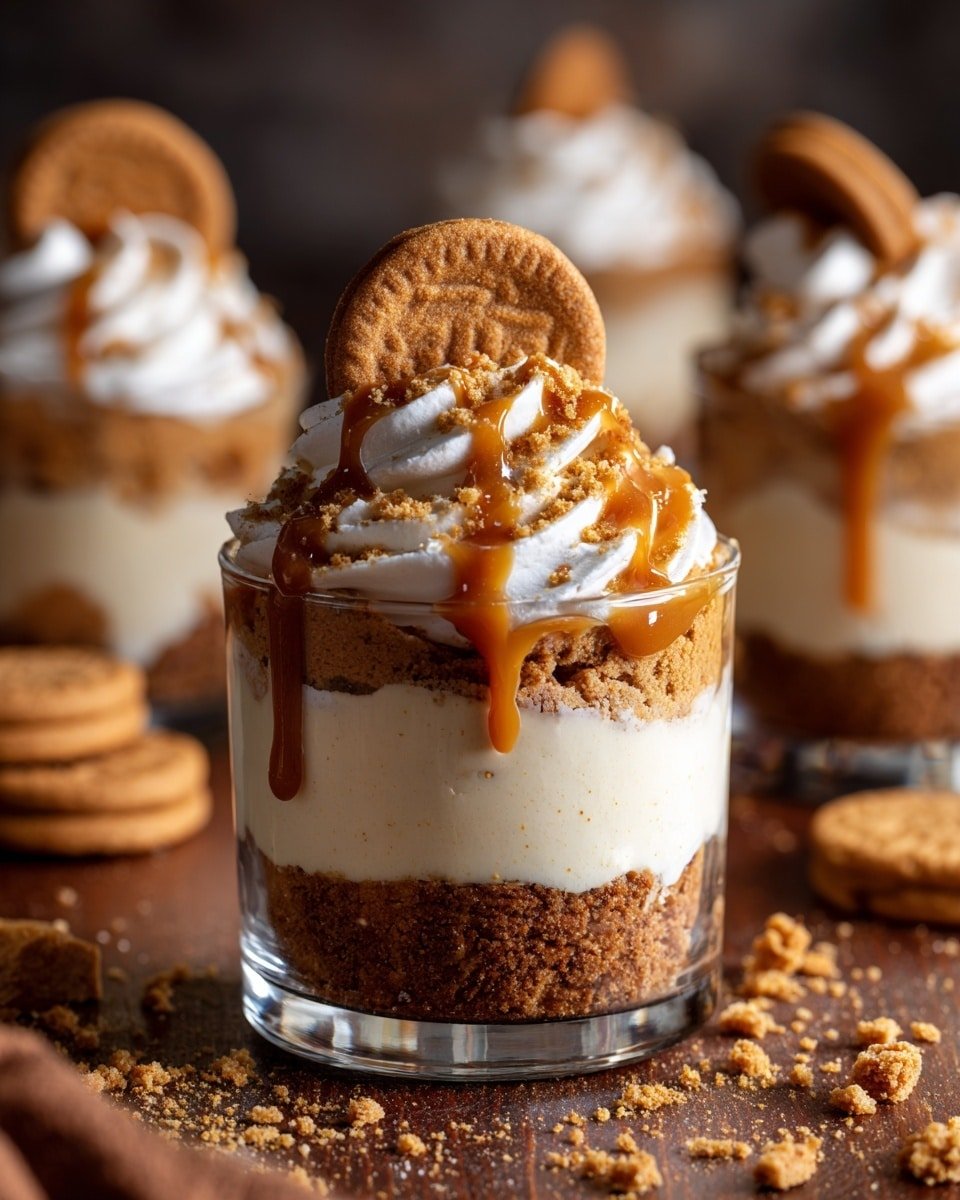
Simple Plating Wins
Serve these cups in small clear jars or pretty glasses to show off the layers. Add a tiny sprig of mint or a thin cinnamon stick for an elegant touch with minimal effort. It's such an easy way to make a casual dessert feel special.
Make-Ahead, Storage & Reheat
Storing Leftovers
Keep your Cookie Butter Cheesecake Cups refrigerated in an airtight container or covered tightly with plastic wrap. They stay fresh and creamy for up to 3 days. After a day, the crust might soften a bit but won't lose its charm-they'll still taste fantastic.
Freezing Tips
These cheesecake cups freeze well if you're careful. Freeze uncovered until firm, then wrap each cup in plastic wrap followed by foil to prevent freezer burn. Thaw overnight in the fridge to preserve that creamy texture. Be mindful that the crust softens a bit, but the overall dessert remains delicious.
Reheating Cookie Butter Cheesecake Cups Recipe Without Drying Out
Since these are best served chilled, reheating isn't usually necessary. If you prefer them slightly warmer, let the cups sit at room temperature for 15 minutes before serving. Avoid microwaving directly, which can dry out the cheesecake or cause the cream to separate.
Frequently Asked Questions
Absolutely! While speculoos or cookie butter sandwich cookies provide that signature spiced flavor, graham crackers or digestive biscuits also work well. Just keep in mind the flavor profile will shift slightly.
No baking is required. This recipe is designed as a no-bake dessert, leveraging whipped cream and chilled setting to achieve a perfect texture without heat.
They last 3 days refrigerated when covered properly. After that, the quality begins to decline, especially the crust's crispness.
You can experiment with vegan cream cheese and coconut cream, but results may vary in texture and taste. If going dairy-free, ensure your cookie butter and cookies fit those dietary needs, too.
Final Thoughts
I love how the Cookie Butter Cheesecake Cups Recipe brings that cozy, nostalgic flavor of cookie butter into an elegant little treat. It's a recipe that feels fancy but never intimidating - perfect for weekday treats or sweeter weekend celebrations. Once you've made it a couple of times, you'll find subtle tweaks that make it your own, which is exactly the magic of desserts like this.
PrintFull Recipe
Cookie Butter Cheesecake Cups Recipe
Delicious Cookie Butter Cheesecake Cups featuring a crunchy cookie crust, creamy cheesecake filling, and luscious cookie butter layers, topped with whipped cream and extra cookie crumbs for an indulgent dessert perfect for any occasion.
- Prep Time: 20 minutes
- Cook Time: 0 minutes
- Total Time: 2 hours 30 minutes
- Yield: 6 servings
- Category: Dessert
- Method: No-Cook
- Cuisine: American
- Diet: Vegetarian
Ingredients
Crust
- 1 ½ cups (150 g) cookie butter sandwich cookies or speculoos cookies, crushed
- 5 tablespoon unsalted butter, melted
Cheesecake Filling
- 225 g (8 oz) cream cheese, softened
- ½ cup (120 ml) heavy cream, cold
- ½ cup (60 g) powdered sugar
- ½ teaspoon vanilla extract
Layer & Garnish
- ½ cup cookie butter spread (slightly melted for easy spreading)
- Whipped cream (for garnish)
- Extra cookie crumbs (for garnish)
- Warmed cookie butter drizzle (for garnish)
Instructions
- Prepare Crust: In a bowl, mix crushed cookies with melted butter until the mixture reaches a sandy texture.
- Form Crust Layer: Press the cookie mixture firmly into the bottom of serving cups or jars to create the base layer.
- Beat Cream Cheese: In a separate bowl, beat the softened cream cheese until smooth and creamy.
- Whip Cream: In another bowl, whip the cold heavy cream until stiff peaks form.
- Combine Filling: Gently fold the whipped cream, powdered sugar, and vanilla extract into the cream cheese until the mixture is light and fluffy.
- Layer Cookie Butter: Spread a thin layer of slightly melted cookie butter over the pressed crust in each cup.
- Add Cheesecake Filling: Spoon the cheesecake filling on top of the cookie butter layer, smoothing it out.
- Repeat Layers: Optionally, repeat the crust, cookie butter, and filling layers for a more indulgent dessert.
- Chill: Refrigerate the assembled cups for at least 2-3 hours to allow the cheesecake to set properly.
- Garnish and Serve: Before serving, top with whipped cream, extra cookie crumbs, and a drizzle of warmed cookie butter for added flavor and presentation.
Notes
- Use speculoos cookies or any spiced cookie for authentic flavor.
- Ensure cream cheese is fully softened to avoid lumps in the filling.
- Whip the heavy cream until stiff peaks for a light and airy filling.
- Warming the cookie butter slightly makes spreading easier but do not overheat.
- Refrigerate long enough to let the cheesecake firm up for best texture.
- For easier serving, use clear jars or cups to showcase the layers.
- Can be customized with toppings like crushed nuts or caramel drizzle.


Leave a Reply