If you're craving something fresh, vibrant, and surprisingly simple to make at home, this Delicious Shrimp Sushi Rolls - Easy Homemade Recipe is exactly what you need. Perfect for a relaxed weekend lunch or an impressive dinner with friends, these sushi rolls satisfy that sushi craving without the hassle of dining out. You'll notice how combining juicy shrimp with creamy avocado and crisp cucumber wrapped in toasty nori creates a glossy, mouthwatering treat every time.
Jump to:
What Sets This Apart
This recipe nails the balance between traditional flavors and home-cooked ease, letting you master sushi rolling without needing special sushi-grade fish or fancy equipment beyond a bamboo mat. I love how approachable it is, making sushi night a fun experience rather than a daunting task.
- Consistent Results: Step-by-step instructions help you get perfectly cooked shrimp and well-seasoned sushi rice every single time.
- Rich, Balanced Flavor: Creamy avocado, crisp cucumber, and tender shrimp come together with just enough vinegar tang in the rice.
- Pantry-First Ingredients: Minimal, easy-to-find items mean you probably have most of what you need already on hand.
- Weeknight Friendly: Ready in under 30 minutes, so it fits right into your busy dinner routine.
Ingredient Snapshot
When it comes to making Delicious Shrimp Sushi Rolls - Easy Homemade Recipe, quality and freshness matter most. Choosing the right sushi rice and fresh shrimp makes your rolls burst with flavor, while crisp vegetables add fresh texture.
- Sushi Rice: Look for short-grain or sushi rice for that sticky, glossy finish essential for rolling.
- Raw Shrimp: Opt for peeled and deveined shrimp with no additives; fresh or frozen both work well.
- Nori Sheets: Choose shiny, fresh sheets that aren't brittle for better rolling.
- Avocado: Pick ripe but firm avocado to avoid mushy rolls.
- Cucumber: Use a seedless, fresh cucumber julienned thin for crunch.
Quick Note: Exact measurements are in the printable recipe card at the bottom.
How to Make Delicious Shrimp Sushi Rolls - Easy Homemade Recipe
Step 1 - Prep & Season
Start by rinsing your sushi rice under cold water until the water runs clear - this washes away excess starch so the rice doesn't clump too much when cooked. Then cook it according to package instructions; I find my rice cooker makes this foolproof. Once cooked, gently fold in rice vinegar, sugar, and salt. This tangy seasoning transforms the rice's texture to that classic sticky, subtly sweet bite sushi rice is known for. Set it aside to cool just enough so it's warm but not hot, which will help with spreading later.
Step 2 - Build Flavor
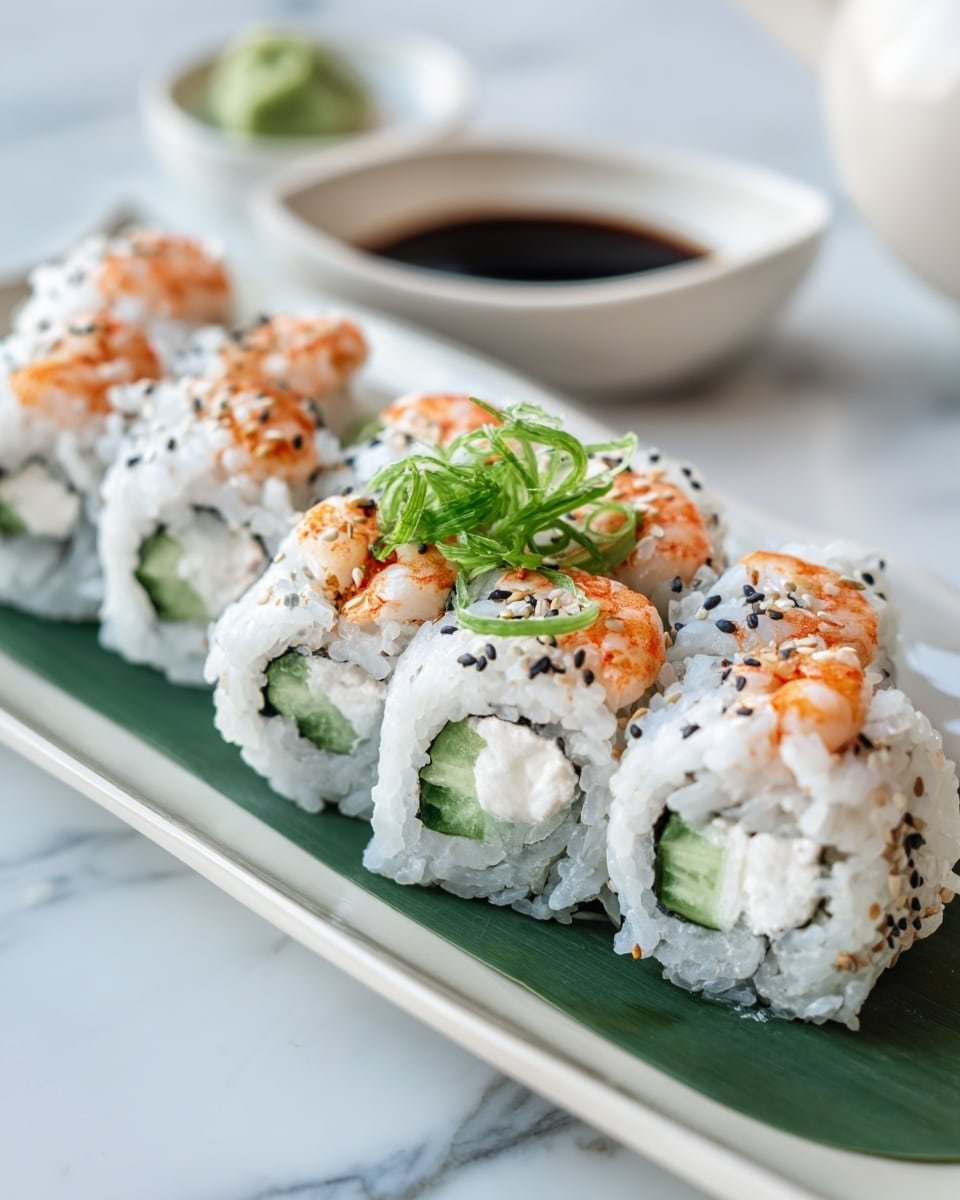
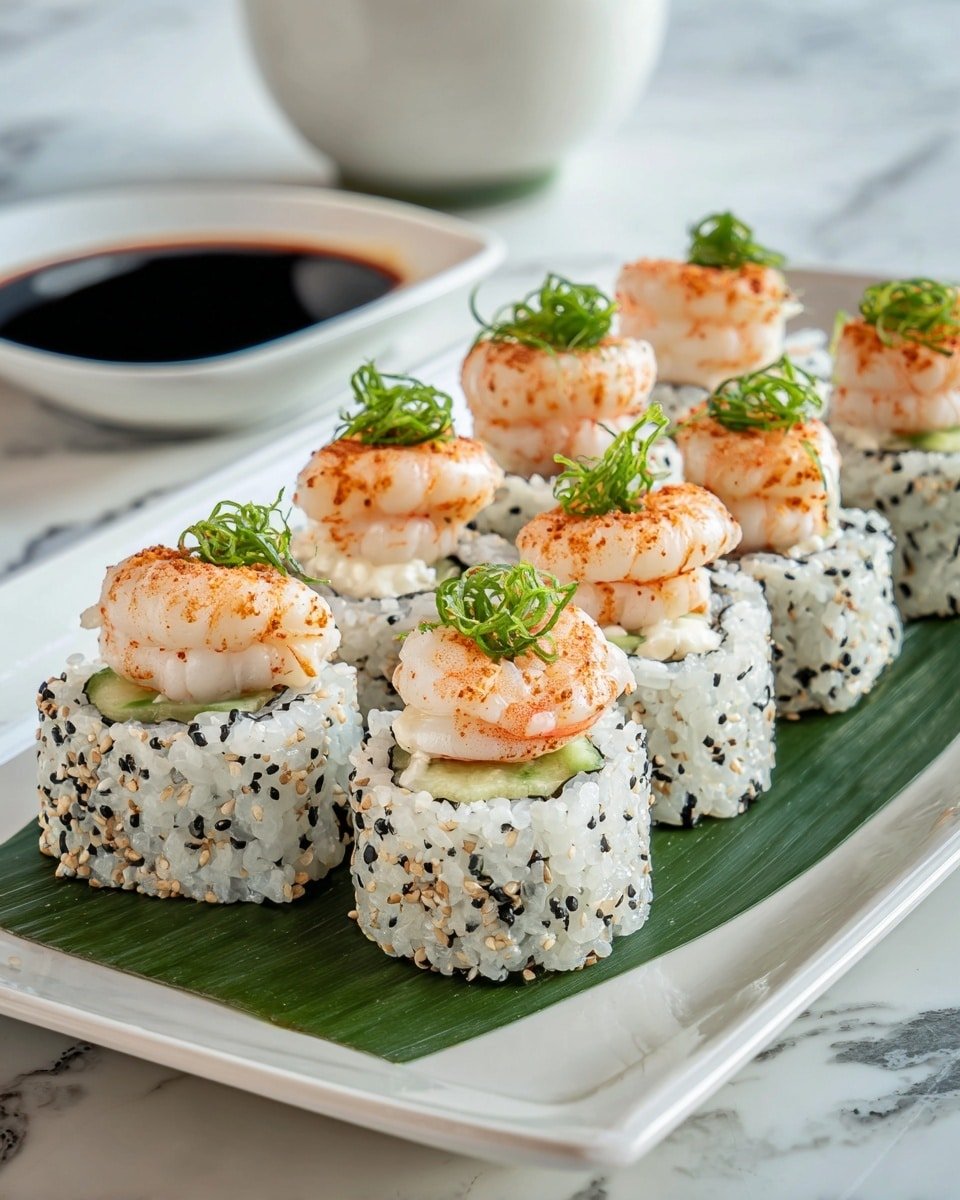
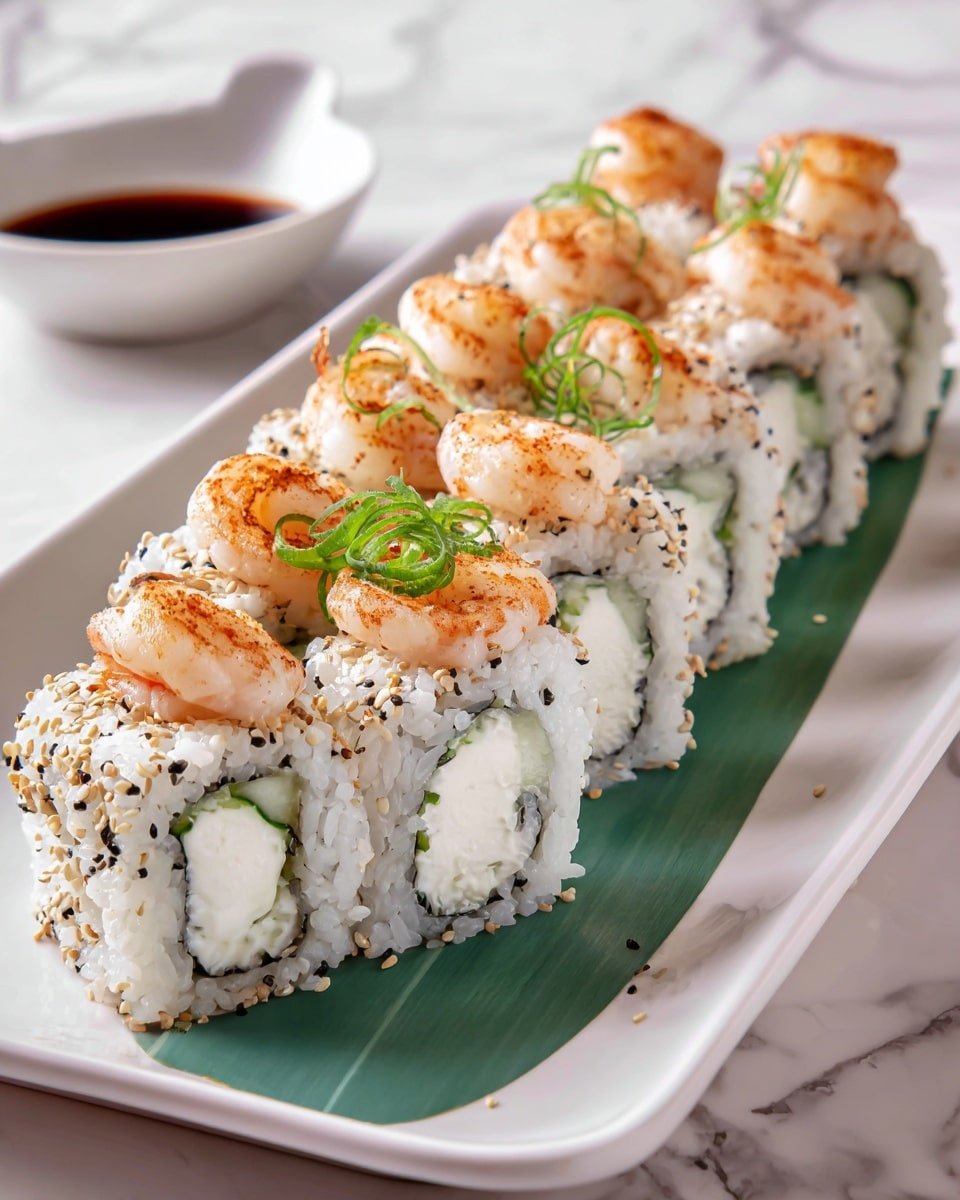
While the rice rests, turn your attention to the shrimp. Cook them in a hot pan over medium heat for about 3 minutes per side until they turn bright pink and are opaque through the center. You're aiming for tender shrimp without overcooking, which makes the texture rubbery. Next, place a nori sheet shiny side down on your bamboo rolling mat. Wet your hands lightly to prevent rice sticking, then spread a thin, even layer of the seasoned rice onto the nori, leaving about an inch bare at the top edge to seal the roll later. Lay the cooked shrimp in a line along the rice, then add your crunchy cucumber slivers and silky avocado slices for that perfect balance of flavors and textures.
Step 3 - Finish for Best Texture
Using your bamboo mat, gently but firmly roll the sushi away from you, applying even pressure to ensure a tight roll without crushing the ingredients. When you reach the bare edge of nori, wet it slightly with water to seal the roll securely. For slicing, dip a sharp knife in water to stop sticking, then cut the roll into bite-size pieces. You'll notice clean cuts and the glossy rice and vibrant filling peek through beautifully, making the finished rolls as appealing as they taste.
Cook's Notes & Tricks
I've learned that keeping your hands moist while working with sushi rice is crucial to preventing sticky messes - trust me, wet hands make spreading the rice so much easier. Also, don't rush shrimp cooking; a little undercooked is raw, but overcooked shrimp can make your rolls tough, so keep an eye on that pink color as your doneness clue.
- Doneness Cue: Shrimp should be firm, pink, and opaque-not translucent.
- Temperature Trick: Let the sushi rice cool just to warm before assembly to avoid soggy nori.
- Make-Ahead Move: Prep the shrimp and veggies ahead, then assemble just before serving for optimal freshness.
- Avoid This Pitfall: Don't over-pack your roll with rice or fillings-that makes rolling harder and the texture heavy.
Serve & Enjoy
Finishing Touches
For dipping, I always keep soy sauce nearby, sometimes with a dab of wasabi if you like a little kick. Pickled ginger on the side helps cleanse your palate between bites, heightening the fresh shrimp and creamy avocado flavors in the Delicious Shrimp Sushi Rolls - Easy Homemade Recipe.
Pairs Beautifully With
Keep it light and fresh with sides like seaweed salad, edamame sprinkled with sea salt, or a simple miso soup. These pairings bring balance, making your sushi roll experience more complete without overwhelming your taste buds.
Simple Plating Wins
Arrange your sushi rolls in neat rows on a rectangular plate and scatter sesame seeds on top for a touch of texture and visual appeal. A small dish of soy sauce and a few slices of ginger complete the look-simple yet polished, perfect for casual dinners or impressing guests.
Make-Ahead, Storage & Reheat
Storing Leftovers
Place leftover shrimp sushi rolls in an airtight container and store them in the refrigerator. They keep well for up to 24 hours, but you'll notice the nori softens and the texture changes after a day, so I recommend enjoying them fresh whenever possible.
Freezing Tips
These sushi rolls aren't ideal for freezing because the rice and nori texture degrade once thawed, leading to soggy, less enjoyable bites. If you want to prep components ahead, cook and freeze shrimp separately, and prepare rice fresh when ready to roll.
Reheating Delicious Shrimp Sushi Rolls - Easy Homemade Recipe Without Drying Out
If you must reheat, I recommend a quick microwave blast (about 15 seconds) covered with a damp paper towel to keep moisture in-but note that freshly made rolls are always best. Avoid overheating to keep shrimp juicy and rice soft without drying out.
Frequently Asked Questions
Yes, pre-cooked shrimp can save time, but make sure to chop them into uniform pieces for easier rolling and a consistent bite.
Keep a small bowl of water nearby and wet your hands lightly before handling the rice. This simple step prevents sticking and helps spread the rice evenly on the nori.
You can carefully roll sushi by hand using parchment paper or even a clean kitchen towel; just be patient and gentle to keep the roll tight.
Absolutely! Feel free to add ingredients like thinly sliced carrots, cream cheese, or spicy mayo to customize your rolls to your taste.
Final Thoughts
PrintFull Recipe
Delicious Shrimp Sushi Rolls - Easy Homemade Recipe

This Delicious Shrimp Sushi Rolls recipe is an easy homemade way to enjoy fresh, flavorful sushi. Featuring perfectly cooked shrimp, seasoned sushi rice, and crisp vegetables wrapped in nori, it's a delightful dish perfect for sushi lovers looking to make their own rolls at home.
- Prep Time: 15 minutes
- Cook Time: 10 minutes
- Total Time: 25 minutes
- Yield: 4 servings
- Category: Main Course
- Method: Stovetop
- Cuisine: Japanese
- Diet: Halal
Ingredients
Rice
- 1 cup sushi rice
- 2 tablespoons rice vinegar
- 1 tablespoon sugar
- ½ teaspoon salt
Shrimp and Filling
- 8 large raw shrimp (peeled and deveined)
- 2 nori sheets
- ½ cucumber (julienned)
- 1 ripe avocado (sliced)
Serving
- Soy sauce for dipping
Instructions
- Prepare Sushi Rice: Rinse the sushi rice under cold water until the water runs clear to remove excess starch. Cook the rice according to the package instructions, typically by boiling or steaming.
- Season Rice: In a bowl, combine the cooked rice with rice vinegar, sugar, and salt. Mix gently and allow the rice to cool slightly to absorb the flavors.
- Cook Shrimp: Heat a pan over medium heat and cook the peeled and deveined shrimp for about 3 minutes per side until they turn pink and opaque, ensuring they are fully cooked.
- Assemble the Roll: Place one nori sheet shiny-side down on a bamboo rolling mat. Wet your hands to prevent sticking and evenly spread a thin layer of the seasoned sushi rice over the nori, leaving about an inch uncovered at the top edge for sealing.
- Add Fillings: Arrange the cooked shrimp, julienned cucumber, and sliced avocado in a horizontal line across the rice-covered nori sheet.
- Roll Sushi: Using the bamboo mat, roll the sushi tightly from the bottom edge upwards, pressing gently to ensure a firm roll. Seal the edge with a little water to hold the roll together.
- Slice and Serve: With a wet knife, carefully slice the roll into bite-sized pieces. Serve immediately with soy sauce for dipping.
Notes
- Use a sharp knife dipped in water for clean sushi slices without sticking.
- Make sure to cool the rice slightly before assembling to prevent tearing of the nori.
- You can substitute shrimp with cooked crab or smoked salmon for variation.
- Keep a bowl of water nearby to wet hands while handling rice to avoid sticking.
- For added flavor, sprinkle sesame seeds or add a touch of wasabi inside the roll.


Leave a Reply