Homemade Sub Rolls Recipe brings the warm, fresh bakery feeling right to your kitchen whenever you need it. Whether you're prepping sandwiches for a family dinner or planning a weekend cookout, making these soft and sturdy sub rolls is so satisfying. I love how they have that perfect chewy crumb and toasty crust that you just can't beat from store-bought bread.
Jump to:
What Sets This Apart
This Homemade Sub Rolls Recipe hits all the right notes for a crowd-pleasing sandwich base: soft inside, lightly crisp outside, with a subtle depth of flavor. It's approachable even if you don't bake often, yet delivers bakery-quality results you'll be proud of.
- Consistent Results: The recipe's clear timing and kneading cues help you get tender, airy rolls every time.
- Rich, Balanced Flavor: Olive oil, garlic powder, and optional herbs create a nuanced taste without overpowering your sandwich fillings.
- Pantry-First Ingredients: No exotic flours or fancy gadgets needed - just staples you probably have on hand.
- Weeknight Friendly: While it takes time to rise, hands-on work is minimal, so you can prep after work and bake when ready.
Ingredient Snapshot

Choosing quality ingredients makes all the difference in your Homemade Sub Rolls Recipe. Simple pantry staples combine for a tender crumb and crust that's just the right balance of chewy and soft.
- Bread flour or all-purpose flour: Bread flour gives extra chew and structure, but all-purpose works well too if you don't have bread flour.
- Warm water (105-110°F): This temperature activates yeast without killing it - feel warm but not hot to your wrist.
- Active dry yeast: Make sure it's fresh and properly foamy for a good rise.
- Olive oil: Extra virgin enhances flavor; it also tenderizes the crumb beautifully.
- Garlic powder & optional herbs: These add a subtle, homemade touch when you want to elevate your rolls.
- Cornmeal dusting: Creates a delicate crunch on the bottom and prevents sticking.
Quick Note: Exact measurements are in the printable recipe card at the bottom.
How to Make Homemade Sub Rolls Recipe
Step 1 - Prep & Season
Start by activating your yeast. Pour warm water into a large bowl, add sugar, and sprinkle the yeast evenly on top. You'll want to wait about 5-10 minutes until the surface becomes foamy and bubbly - that's the yeast waking up and ready to work. If after 10 minutes you don't see this, refresh your yeast for best results. Then stir in olive oil to infuse some richness.
Step 2 - Build Flavor
Whisk together your dry ingredients - flour, salt, and garlic powder - in a separate bowl. Slowly add this mixture to the yeast water, stirring until a shaggy dough forms. This is your base - shaggy and sticky is perfect here. Next, knead the dough either by hand on a floured surface for 8 to 10 minutes or use a stand mixer with a dough hook for 6 to 8 minutes. The texture should become smooth, elastic, and slightly tacky but not sticky. This kneading builds the gluten structure so your rolls come out airy and tender, so be patient here.
Step 3 - Finish for Best Texture
Place your dough ball into an oiled bowl, turning to coat. Cover with a kitchen towel or plastic wrap and let it rise in a warm place for 1 to 1.5 hours, until it doubles in size and looks pillowy. Punch it down gently to release air, then divide into eight equal portions. Shape each piece into a 6 to 7-inch oval - this shape makes the classic sub roll. Arrange on parchment-lined, cornmeal-dusted baking sheets. Let them rise again for 45 to 60 minutes until noticeably puffy. Just before baking, slash a shallow cut lengthwise on each roll - this helps them expand beautifully in the oven. Brush with egg wash for that glossy finish, sprinkle sesame seeds or coarse salt if you like, and pop them in a 425°F oven with a pan of hot water for steam. Bake about 18 to 20 minutes, until deep golden with a hollow sound when tapped. Let cool on wire racks to keep the crust crisp and the interior tender.
Cook's Notes & Tricks
I've found that keeping a close eye on your dough's feel rather than just the clock really helps your homemade sub rolls shine every time. Dough temperature and environment can shift rising times, so trust the texture cues and appearance more than the minutes.
- Doneness Cue: Look for a deep golden crust and a hollow thump sound when you tap the bottom of a roll - a classic sign of perfectly baked bread.
- Temperature Trick: Warm (not hot) water is key. Lukewarm feels just right and keeps yeast happy without killing it.
- Make-Ahead Move: You can refrigerate shaped rolls overnight after the second rise. Bring to room temp before baking for an easy prep workflow.
- Avoid This Pitfall: Don't over-flour your dough when kneading to maintain that soft crumb. A slightly sticky dough is better than too dry.
Serve & Enjoy
Finishing Touches
The egg wash gives these rolls a beautiful, glossy finish that feels special and makes toppings like sesame seeds stick perfectly. I also love sprinkling coarse sea salt before baking - it adds just that little pop of flavor and crunch that complements sandwich fillings.
Pairs Beautifully With
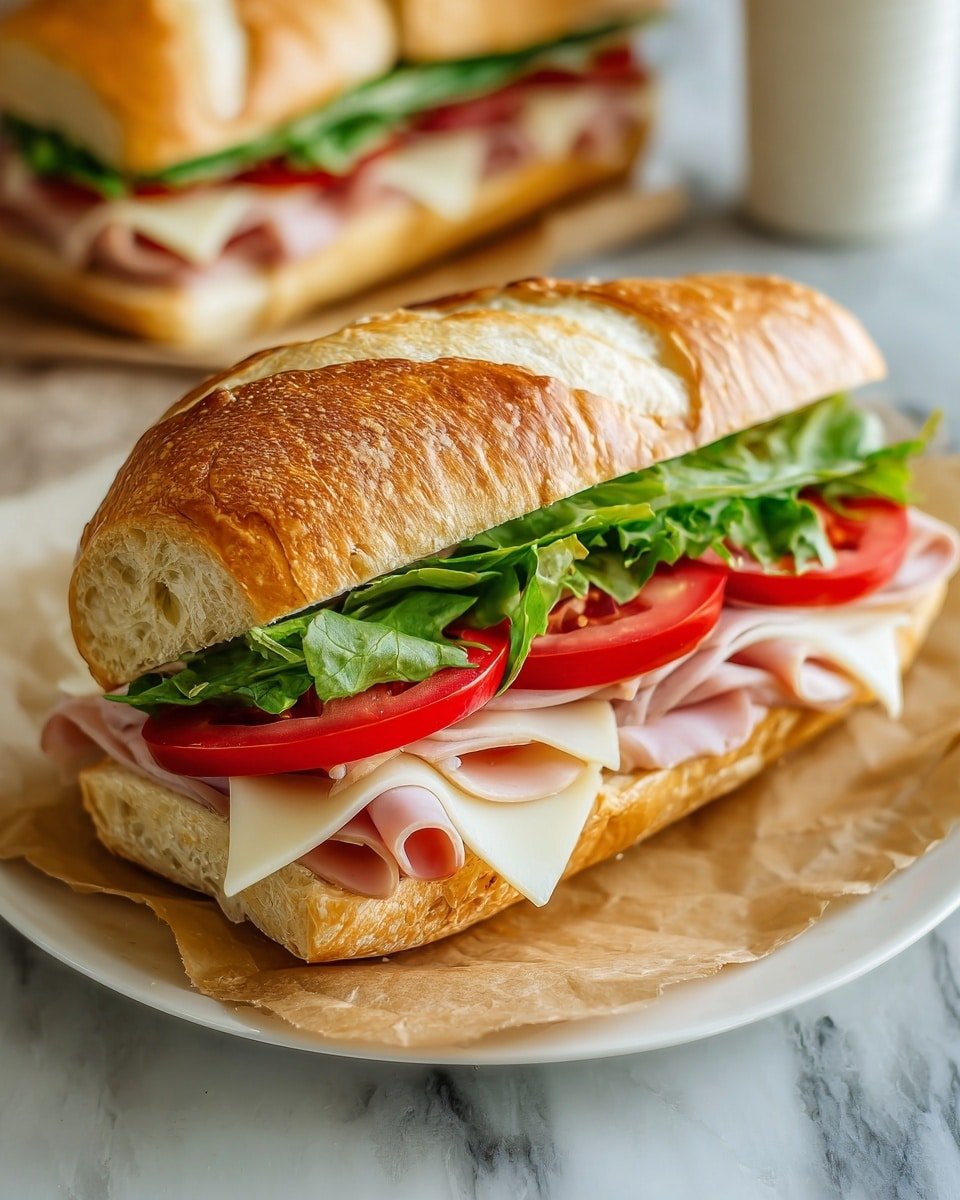
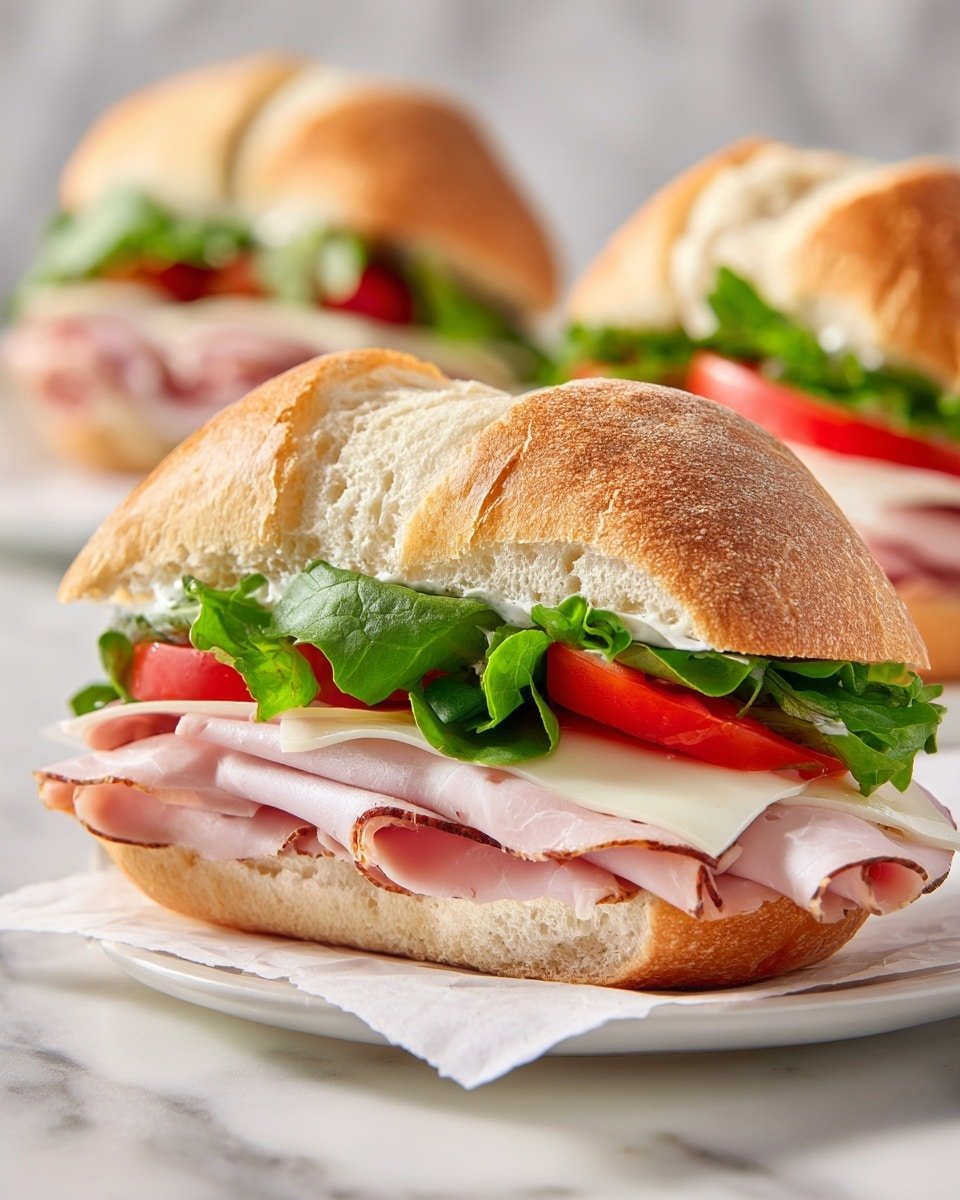
These rolls are a perfect canvas for so many fillings - think classic Italian deli meats, crisp lettuce, juicy tomatoes, or even warm meatballs in marinara. Their chewy but tender bite balances rich cheeses and tangy condiments without falling apart.
Simple Plating Wins
For weeknights, slice these rolls open and neatly arrange your favorite sandwich layers for a no-fuss assembly. For special occasions, try styling your platter with a variety of meats, cheeses, and fresh veggies so each guest can build their own masterpiece. The rolls' glossy surface makes every plate look polished, even when you keep it simple.
Make-Ahead, Storage & Reheat
Storing Leftovers
Store leftover sub rolls in an airtight container or resealable bag at room temperature for up to 2 days to keep them soft. If you want to extend freshness, wrap tightly and place in the fridge, though the texture may become a bit firmer.
Freezing Tips
I often freeze shaped rolls right after the first rise, wrapped in plastic and foil. They thaw overnight in the fridge, then you can let them finish rising and bake fresh. This method helps maintain great texture and flavor so you have homemade sub rolls ready anytime.
Reheating Homemade Sub Rolls Recipe Without Drying Out
The best reheating method is to lightly mist your rolls with water, then warm them in a preheated 350°F oven for 5-7 minutes. This revives the crust's crispness and soft crumb without drying. You can also use an air fryer on low heat or microwave wrapped in a damp paper towel for a quick fix, but watch carefully to avoid toughness.
Frequently Asked Questions
Yes, all-purpose flour works well, though your rolls may be slightly less chewy and structured. Bread flour adds more gluten for that classic sub roll texture.
When you mix yeast into warm water and sugar, it should foam and bubble within 5 to 10 minutes. If not, it's likely expired or the water was too hot or cold.
Absolutely! Adding Italian seasoning, rosemary, or grated Parmesan enhances flavor beautifully and makes your rolls unique and aromatic.
Steam helps create a crisp, shiny crust by keeping the dough surface moist in the early stages of baking. Placing a pan with hot water in the oven replicates commercial steam ovens.
Final Thoughts
Mastering this Homemade Sub Rolls Recipe opens the door to so many delicious sandwiches that come alive with fresh bread. Once you get comfortable with the timing and feel of the dough, you'll be making these for every occasion - and I promise, everyone will notice the difference. Take your time, enjoy the process, and savor the inevitable buttery, chewy bites.
PrintFull Recipe
Homemade Sub Rolls Recipe

A detailed recipe for homemade sub rolls that are soft, flavorful, and perfect for sandwiches. These rolls feature an enriched dough with olive oil and optional seasonings, a two-stage rising process, and a baking technique that includes steam for a crisp crust and a tender interior.
- Prep Time: 20 minutes
- Cook Time: 20 minutes
- Total Time: 2 hours 40 minutes
- Yield: 8 rolls
- Category: Bread
- Method: Baking
- Cuisine: American
Ingredients
Dough Ingredients
- 4 cups 480g bread flour or all-purpose flour
- 1 ½ cups 355ml warm water (105-110°F)
- 2 ¼ teaspoon 1 packet active dry yeast
- 2 tablespoon granulated sugar
- 2 tablespoon olive oil extra virgin preferred
- 2 teaspoon salt
- 1 teaspoon garlic powder optional
For Dusting and Toppings
- 2 tablespoon cornmeal for dusting
- 1 egg beaten, for egg wash
- 2 tablespoon sesame seeds optional topping
- 1 teaspoon coarse sea salt for sprinkling
Optional Flavor Additions
- 1 tablespoon Italian seasoning optional flavor addition
- 1 teaspoon onion powder optional flavor addition
- 2 tablespoon grated Parmesan cheese optional flavor addition
- 1 tablespoon dried rosemary chopped optional flavor addition
Other
- olive oil spray for oiling bowl and pans
Instructions
- Activate Yeast: In a large bowl, combine warm water and sugar, then sprinkle the active dry yeast over the surface. Let the mixture sit for 5-10 minutes until the yeast is foamy, indicating it is active.
- Mix Dough: Stir olive oil into the yeast mixture. In a separate bowl, whisk together flour, salt, and garlic powder. Add the flour mixture to the yeast mixture and stir until a shaggy dough forms.
- Knead Dough: Turn the dough onto a floured surface and knead for 8-10 minutes until smooth and elastic. Alternatively, use a stand mixer with a dough hook and knead for 6-8 minutes.
- First Rise: Shape the dough into a ball and place it in a bowl coated with olive oil spray. Cover with a kitchen towel or plastic wrap, and let it rise for 1 to 1 ½ hours until doubled in size.
- Shape Rolls: Punch down the risen dough and divide it into 8 equal pieces, about 3.5 ounces each. Shape each piece into a 6-7 inch oval. Arrange the shaped rolls on parchment-lined baking sheets dusted with cornmeal.
- Second Rise: Cover the rolls and let them rise for 45-60 minutes until puffy.
- Prepare to Bake: Preheat the oven to 425°F (220°C). Place a pan of hot water in the oven to create steam. Using a sharp knife or razor blade, slash each roll lengthwise about ¼ inch deep.
- Egg Wash & Bake: Brush the tops of the rolls with beaten egg and sprinkle with sesame seeds and coarse sea salt if desired. Bake for 18-20 minutes until golden brown and the rolls sound hollow when tapped. Transfer to wire racks to cool.
Notes
- For softer crust, brush with melted butter immediately after baking.
- Adding optional herbs like Italian seasoning, rosemary, or Parmesan cheese adds extra flavor and can be mixed into the dough or sprinkled on top before baking.
- Ensure water temperature is not too hot to avoid killing the yeast-ideal is 105-110°F.
- If you don't have a stand mixer, kneading by hand on a floured surface works just fine.
- Steam in the oven helps develop a crispy crust on the rolls.
- Store rolls in an airtight container to maintain freshness for up to 2 days or freeze for longer storage.


Leave a Reply