If you're craving a comforting, cozy drink that perfectly captures fall vibes, this Instant Pot Pumpkin Apple Cider Recipe is exactly what you need. It's a simple, flavorful cider made quickly with fresh apples and creamy pumpkin purée, ideal for chilly afternoons or holiday gatherings. I love how the Instant Pot speeds up the process while coaxing out all the warm spices and natural sweetness into a juicy, drinkable delight.

Jump to:
What Sets This Apart
This Instant Pot Pumpkin Apple Cider Recipe transforms simple pantry staples into a luscious, spiced beverage that's both wholesome and soul-soothing. Thanks to the magic of the Instant Pot, it comes together fast without sacrificing deeper flavor layers or texture.
- Consistent Results: The pressure cooking extracts rich flavors evenly, so your cider always tastes perfectly balanced from batch to batch.
- Rich, Balanced Flavor: Pumpkin's subtle earthiness blends beautifully with tart apples, cinnamon, and nutmeg to create warmth without overwhelming sweetness.
- Pantry-First Ingredients: This recipe champions fresh apples and pure pumpkin purée, ingredients you likely already have on hand or can easily find.
- Weeknight Friendly: Minimal prep and a short cook time mean you can enjoy homemade cider even on busy evenings.
Ingredient Snapshot
Choosing the right ingredients makes all the difference in this Instant Pot Pumpkin Apple Cider Recipe. I recommend a combination of tart and sweet apples for complexity, plus pure pumpkin purée for that rich body and authentic autumn flavor.
- Fresh apples: Pick a mix like Honeycrisp for sweetness and Granny Smith for brightness to keep your cider nicely balanced.
- Canned pumpkin purée: Use 100% pumpkin purée, not pumpkin pie filling, to avoid added sugars and spices.
- Cinnamon sticks: Whole sticks infuse warmer, more mellow spice notes compared to powders.
- Pure maple syrup: Adds natural sweetness and depth without overpowering the fruit flavors.
- Ground nutmeg: A pinch brightens and rounds out the spice blend.
- Filtered water: Clean-tasting water keeps the cider refreshing and pure.
Quick Note: Exact measurements are in the printable recipe card at the bottom.
How to Make Instant Pot Pumpkin Apple Cider Recipe
Step 1 - Prep & Season
Start by chopping your apples into medium-sized wedges; about 1-inch chunks work best. This size lets them soften completely without turning mushy. Then, gather your other ingredients: canned pumpkin purée, cinnamon sticks, pure maple syrup, nutmeg, and filtered water. You'll notice the fragrant smell of cinnamon as you prepare - it's the first sign that you're headed for something delicious.
Step 2 - Build Flavor
Place the apples, pumpkin purée, cinnamon sticks, nutmeg, maple syrup, and water into your Instant Pot. Give everything a gentle stir to combine the flavors before sealing the lid. Setting the Instant Pot to manual high pressure for 10 minutes ensures the apples break down just enough to release their juices, while the pumpkin adds creamy richness. You'll love how the kitchen fills with those cozy fall aromas as it cooks.
Step 3 - Finish for Best Texture
Once the pressure cooking cycle ends, let the Instant Pot release naturally for about 10 minutes to preserve those delicate flavors. Follow that with a quick release to let out any remaining steam. Strain the cooked mixture through a fine mesh sieve or cheesecloth to separate the solids from the smooth cider. Stir gently before pouring into mugs. The result is a glossy, spiced cider that's perfectly balanced - not too watery, not too thick.
Cook's Notes & Tricks
If you're like me, you want the perfect sippable texture and spice level every time. A little patience during the natural pressure release preserves warmth and flavor. Adding apples in wedges rather than slicing thin prevents an overly cloudy drink, while straining well keeps the cider silky smooth.
- Doneness Cue: Apples should be tender enough to mash lightly with a spoon but not fall apart completely before straining.
- Temperature Trick: Serve the cider warm but not boiling to keep the maple syrup's nuanced sweetness bright.
- Make-Ahead Move: The cider tastes even better the next day once flavors meld; simply reheat gently.
- Avoid This Pitfall: Don't rush the natural release - it avoids a harsh steam burst that can dilute the flavor and make cleanup tricky.
Serve & Enjoy

Finishing Touches
For that final cozy touch, I like to add an extra cinnamon stick in each mug for stirring and garnish. A light sprinkle of freshly grated nutmeg on top lifts the aroma beautifully. The cider is wonderful served warm, but it's also lovely just slightly cooled to enjoy the pumpkin and apple notes fully.
Pairs Beautifully With
This cider pairs perfectly with crunchy roasted nuts, soft cheddar cheese, or spiced cookies. I often serve it alongside a warm slice of pumpkin bread or my favorite cinnamon rolls to round out a comforting fall snack or dessert spread - you get a lovely mix of texture and sweet-savory balance.
Simple Plating Wins
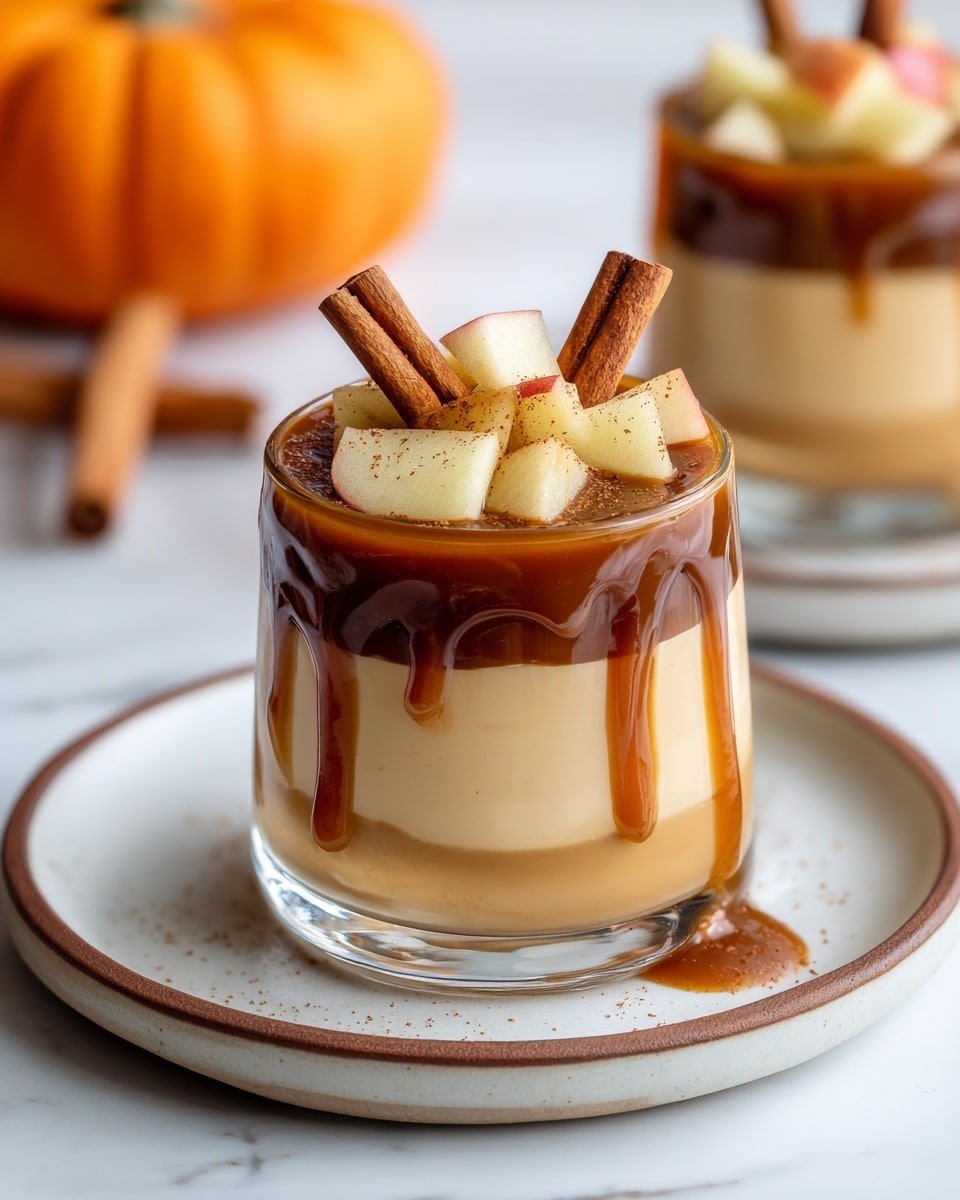
Serve your cider in clear glass mugs to showcase the warm amber hue. Tuck a cinnamon stick or apple slice on the rim for an inviting look. If you're hosting, set up a cozy station with mugs, extra toppings like whipped cream or caramel drizzle, and a small bowl of whole cinnamon sticks to personalize each cup.
Make-Ahead, Storage & Reheat
Storing Leftovers
Store leftover Instant Pot Pumpkin Apple Cider in airtight glass containers in the fridge for up to 4 days. You'll notice the flavors deepen over time, but give it a gentle stir before reheating to reincorporate any settled spices or pumpkin solids.
Freezing Tips
This cider freezes well in sturdy freezer-safe containers or bags for up to 3 months. Thaw overnight in the fridge and warm gently on the stove or microwave, stirring to maintain texture. Avoid refreezing once thawed for best flavor.
Reheating Instant Pot Pumpkin Apple Cider Recipe Without Drying Out
To reheat without drying out the cider, gently warm it on low heat on the stove or in short bursts in the microwave, stirring midway. Adding a splash of water or a pinch of cinnamon while reheating refreshes the flavors. Avoid boiling, which can dull the maple syrup's sweetness and cause it to taste flat.
Frequently Asked Questions
Yes, but it requires roasting and pureeing the pumpkin beforehand. Using canned pure pumpkin purée saves time and provides consistent texture for the cider.
The maple syrup adds natural sweetness that's mild and balanced. Taste after cooking, and if you prefer a sweeter cider, stir in a little extra maple syrup or honey when serving.
Absolutely! Making it a day ahead lets the flavors meld beautifully. Store chilled and warm gently before serving.
Using a fine mesh strainer or cheesecloth works best to catch pulp and cinnamon bits, resulting in a silky, clear cider that's pleasant to sip.
Final Thoughts
PrintFull Recipe
Instant Pot Pumpkin Apple Cider Recipe

Warm and comforting Instant Pot Pumpkin Apple Cider combines fresh apples, pumpkin purée, and warming spices into a delicious seasonal beverage that's easy to prepare and perfect for chilly days.
- Prep Time: 10 minutes
- Cook Time: 10 minutes
- Total Time: 30 minutes
- Yield: 6 servings
- Category: Beverage
- Method: Instant Pot
- Cuisine: American
- Diet: Vegetarian
Ingredients
Main Ingredients
- 4 cups fresh apples (mixed varieties like Honeycrisp and Granny Smith), chopped
- 1 cup canned pumpkin purée (100% pumpkin)
- 3 cinnamon sticks
- ½ cup pure maple syrup
- ¼ teaspoon ground nutmeg
- 4 cups filtered water
Instructions
- Prepare Ingredients: Chop the fresh apples into wedges to ensure even cooking and easy blending of flavors.
- Add to Instant Pot: Place the chopped apples, pumpkin purée, filtered water, cinnamon sticks, maple syrup, and ground nutmeg into the Instant Pot. Stir the mixture well to combine all ingredients evenly.
- Pressure Cook: Seal the Instant Pot lid securely and set it to manual high pressure for 10 minutes to fully infuse the flavors and cook the apples until tender.
- Release Pressure: Allow the pressure to release naturally for about 10 minutes to avoid sudden temperature changes, then carefully perform quick release for any remaining pressure.
- Strain: Using a fine mesh strainer or cheesecloth, strain the cider to separate solids from the liquid, resulting in a smooth and clear beverage.
- Serve: Stir the cider gently, pour into mugs, and garnish with extra cinnamon sticks if desired. Enjoy warm for the perfect cozy drink.
Notes
- Use a mix of sweet and tart apples like Honeycrisp and Granny Smith for a balanced flavor.
- For a spicier cider, add a pinch of ground cloves or ginger.
- Maple syrup can be substituted with honey or agave nectar to adjust sweetness.
- Ensure natural pressure release to avoid liquid splatter and enhance flavor melding.
- Leftover cider can be refrigerated for up to 3 days and reheated gently before serving.


Leave a Reply