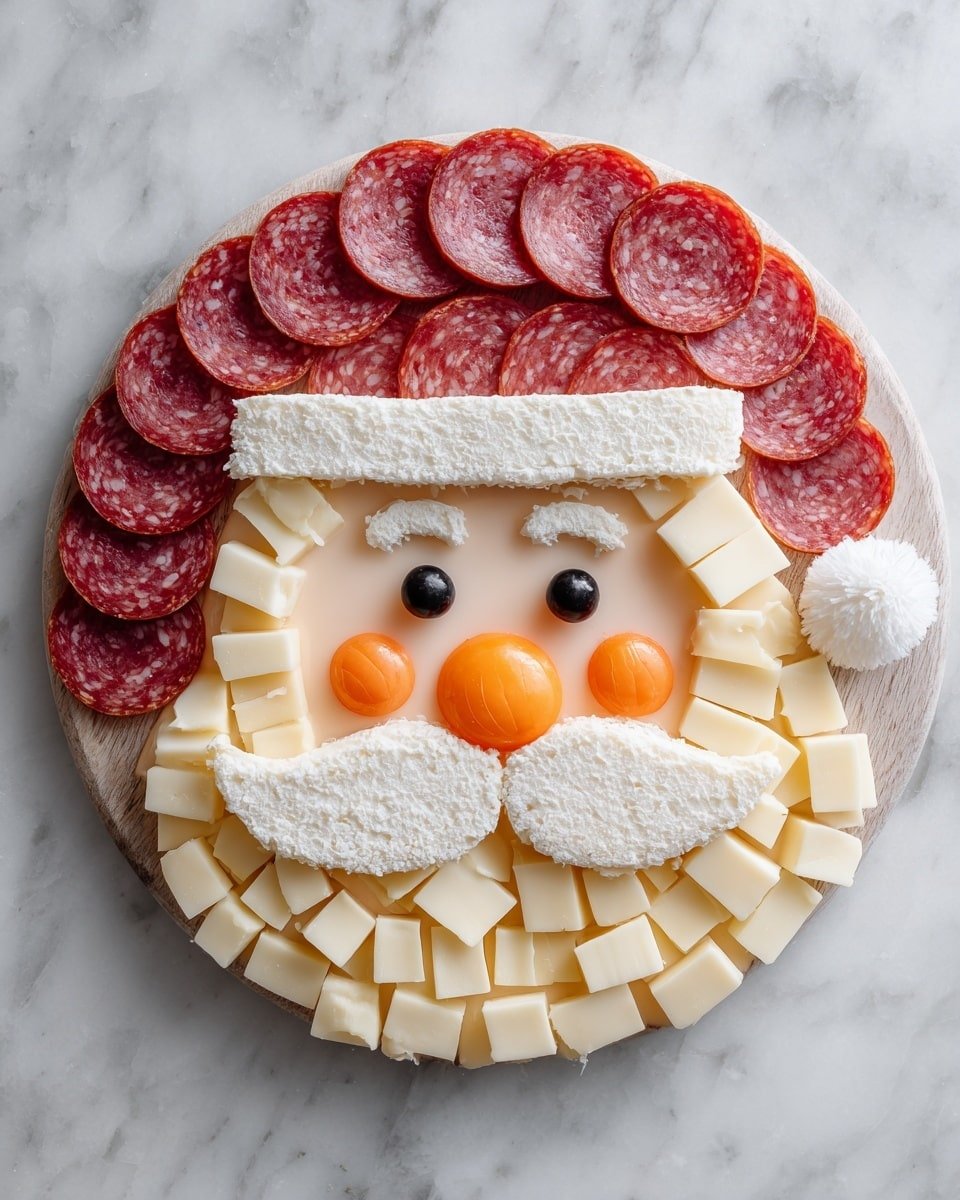
The Santa Cheese Board - How to Make the Ultimate Christmas Party Appetizer Recipe is a festive, crowd-pleasing cheese board that transforms holiday gatherings. It's perfect for when you want a show-stopping appetizer that's almost too cute to eat, yet irresistibly delicious. When you make this, you'll delight guests with its playful Santa design that's full of flavor and texture variety, making your Christmas party extra merry and memorable.

Jump to:
What Sets This Apart
This Santa Cheese Board takes the classic holiday cheese platter to the next level with thoughtful assembly that brings Santa's jolly face to life, pairing savory cheeses and pepperoni with crunchy crackers and briny olives. I love how easily it comes together with pantry staples, yet creates such an impressive centerpiece.
- Consistent Results: The clear layering approach guarantees your Santa looks festive every time without guesswork.
- Rich, Balanced Flavor: Multiple cheeses mixed with pepperoni and olives balance creaminess, saltiness, and tang.
- Pantry-First Ingredients: You probably already have most of these cheeses and crackers, so it's stress-free to prep last minute.
- Weeknight Friendly: No cooking needed-only quick slicing and assembling, perfect for busy hosts.
Ingredient Snapshot
Choosing quality cheeses makes all the difference in this Santa Cheese Board - How to Make the Ultimate Christmas Party Appetizer Recipe. I always suggest picking cheeses with different textures and flavors that complement one another, plus some fresh crackers that offer a satisfying crunch.
- Colby Jack cheese: Opt for a firm block that slices cleanly for the face shape.
- White Cheddar cheese: Aged for pronounced flavor, adds sharpness to the hat base.
- Provolone cheese slices: Smooth texture, perfect for layering subtle contrasts.
- Mozzarella cheese slices: Soft and creamy, great for Santa's fluffy beard and trim.
- Swiss cheese slices: Mild and nutty, adds depth to the white areas like cheeks or mustache.
- Pepperoni slices: Bright red, slightly spicy-ideal for Santa's hat and nose.
- Black olives: Choose firm olives without pits for easy slicing as Santa's eyes.
- Assorted crackers: Mix grainy, buttery, and artisan crackers to fill gaps with texture variety.
Quick Note: Exact measurements are in the printable recipe card at the bottom.
How to Make Santa Cheese Board - How to Make the Ultimate Christmas Party Appetizer Recipe
Step 1 - Prep & Season
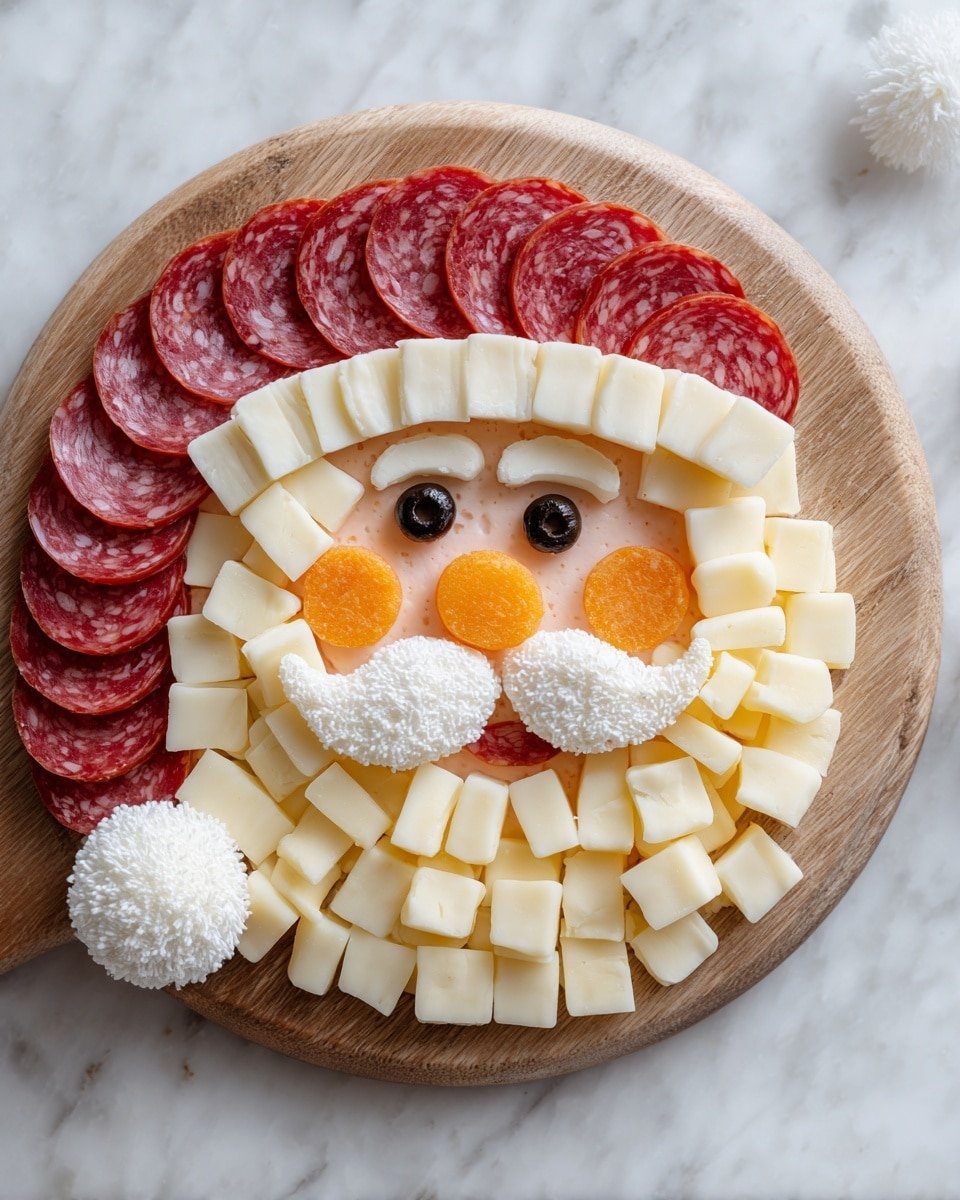
Start by cubing your Colby Jack and white cheddar into bite-sized pieces-aim for clean edges so Santa's face looks sharp and inviting. Lay the Colby Jack cubes in a roughly oval arrangement to form Santa's rosy cheeks and face base. Spread the white cheddar cubes above for the hat brim. If you slice cheeses yourself, use a sharp knife and steady hand to keep the slices even. You'll notice that this early shape-making sets the tone for your entire board's festive look.
Step 2 - Build Flavor
Next, layer pepperoni slices over the white cheddar for Santa's iconic red hat. Sprinkle some slices strategically to form the tilted hat's body. Use mozzarella and Swiss slices to create the fluffy beard, mustache, eyebrows, cheeks, mouth, and even nose. My favorite trick is to fold and slightly overlap slices to build up fluffy texture in the beard area. Place black olive slices as eyes to bring Santa's face alive with character. This step is where the magic and flavor fully come together-take your time to make it look as joyful as it tastes.
Step 3 - Finish for Best Texture
Fill in any gaps with assorted crackers for satisfying crunch and visual balance. To add final charm, dot the hat trim and pom-pom with extra mozzarella bits for softness. Since this cheese board requires no cooking, focus on keeping everything cold and fresh until serving. Avoid letting the cheeses sit at room temperature too long to prevent melting or dryness. Serving immediately or storing wrapped in the fridge ensures the best texture.
Cook's Notes & Tricks
Over the years, I've learned that assembling this Santa Cheese Board slowly and attentively really yields the best results-you want each element distinct yet harmonious. Don't rush the layering of cheeses for the beard; a little patience pays off in rich texture and visual impact. I always prepare the cheeses chilled and work quickly to keep them looking fresh and glossy.
- Doneness Cue: Since this is a no-cook appetizer, freshness and firmness of all ingredients are your key signs of readiness.
- Temperature Trick: Keep the cheeses refrigerated until last minute assembly to avoid melting or dryness.
- Make-Ahead Move: Chop and slice all ingredients up to a day ahead; assemble just before serving.
- Avoid This Pitfall: Don't overcrowd the board with too many crackers or small pieces, or Santa's face won't be the star.
Serve & Enjoy
Finishing Touches
I love to complement the Santa Cheese Board with sprigs of fresh rosemary or a few red cherry tomatoes around the edge for extra holiday flair. The assorted crackers aren't just filling gaps - they also provide a crunchy counterpoint to the creamy cheeses and savory pepperoni, rounding out the experience perfectly.
Pairs Beautifully With
Serve with a sparkling red or white wine to balance richness, or offer some honey and fig jam on the side for a sweet contrast. I find that a crisp apple or pear cider also pairs wonderfully with the salty, creamy notes of the board.
Simple Plating Wins
To keep serving straightforward but festive, arrange everything on a large wooden board or slate platter. You'll enjoy fresh-looking Santa designs nestled in the center and scattered crackers fanning outward. It looks effortless, but guests will be impressed every time.
Make-Ahead, Storage & Reheat
Storing Leftovers
Store leftovers in an airtight container or wrap the board tightly with plastic wrap to prevent drying out. It'll keep well in the fridge for up to 3 days, but note that crackers may lose crunch over time, so I recommend enjoying the board as fresh as possible.
Freezing Tips
This cheese board doesn't freeze well because crackers become soggy and cheeses can change texture. It's best to make fresh or assemble after thawing pre-cut ingredients, rather than freezing the whole board.
Reheating Santa Cheese Board - How to Make the Ultimate Christmas Party Appetizer Recipe Without Drying Out
Since this is a fresh cheese board meant to be served cold, reheating isn't recommended. If you want warm cheese, consider serving the board alongside warm dips or toasted crackers. If any cheese or pepperoni needs refreshing, bring it to room temperature briefly to enhance flavor without drying.
Frequently Asked Questions
Absolutely! Feel free to swap in cheeses you prefer or have handy, just keep a balance of soft and firm textures to maintain the look and taste.
You can prep all chopping and slicing a day ahead, but assemble no more than 1 hour before serving for the freshest appearance.
Store crackers separately until just before serving to keep them crisp and avoid getting soggy from cheese moisture.
You can substitute vegan cheeses and plant-based deli slices, but keep in mind the textures and flavors might differ from traditional cheeses.
Final Thoughts
PrintFull Recipe
Santa Cheese Board - How to Make the Ultimate Christmas Party Appetizer Recipe

Create a festive and visually stunning Santa Cheese Board that's perfect for your Christmas party appetizer. This easy no-cook recipe combines a variety of cheeses, pepperoni, olives, and crackers arranged creatively to resemble Santa's face, making it a fun and delicious centerpiece for holiday gatherings.
- Prep Time: 25 minutes
- Cook Time: 0 minutes
- Total Time: 25 minutes
- Yield: 8 servings
- Category: Appetizer
- Method: No-Cook
- Cuisine: American
Ingredients
Cheeses
- 1 cup Colby Jack cheese, cubed
- 1 cup White Cheddar cheese, cubed
- 6 slices Provolone cheese
- 6 slices Mozzarella cheese
- 6 slices Swiss cheese
Meat and Garnishes
- 20 slices Pepperoni
- 10 Black olives, sliced
Accompaniments
- Assorted crackers (grain, butter, artisan, baguette) - about 2 cups total
Instructions
- Prepare the Face: Arrange the Colby Jack cheese cubes in the shape of Santa's face as the base layer on your serving platter.
- Create the Hat Base: Add the White Cheddar cheese cubes above the face area to form the base of Santa's hat.
- Form the Hat: Layer the pepperoni slices over the white cheddar cheese to build Santa's red hat.
- Add Hat Trim and Pom-Pom: Use the white cheeses to form the hat's trim and pom-pom, placing mozzarella and provolone slices strategically for a fluffy white look.
- Build the Beard: Shape the beard using more slices of mozzarella, provolone, and Swiss cheese, arranging them around the lower part of the face.
- Shape Facial Features: Use cheese pieces and pepperoni to shape Santa's mustache, eyebrows, cheeks, mouth, and nose to add character and detail.
- Add Eyes: Place black olive slices for Santa's eyes to complete the facial features.
- Fill Gaps: Fill any gaps on the board with assorted crackers and garnishes to make the presentation full and festive.
- Serve or Store: Serve the Santa Cheese Board immediately or cover and store in the refrigerator until ready to serve.
Notes
- Use different types of crackers to add variety and texture to the board.
- If you prefer a spicier twist, substitute pepperoni with sliced spicy salami.
- Prepare the cheese board up to 4 hours in advance and keep refrigerated to maintain freshness.
- Use a sharp knife for precise cutting and shaping of cheese pieces.
- Feel free to add small festive garnishes like rosemary sprigs or cherry tomatoes for color contrast.


Leave a Reply